RedFamosa — SMM Panel Script
A complete Social Media Marketing panel you install on your own hosting: sell followers, likes and views through a branded storefront, buy them wholesale from upstream providers, and open child panels for your own resellers — each on their own domain.
RedFamosa is a self-hosted PHP script. You upload one ZIP to your server, run a seven-step web wizard and end up with a working panel — no console, no Composer, no build step. Your customers top up a prepaid balance and place orders; the panel routes those orders to your upstream providers and keeps your margin.
- Seven-step web installer, Production or Demo data
- Upstream provider manager (standard SMM API)
- Catalogue: platforms → categories → services
- Order pipeline with drip-feed, refill and cancel
- In-app + email notifications for tickets, orders, deposits and sign-ups
- Broadcast announcements to all customers (bell + optional email)
- Immutable, auditable wallet ledger
- Payment methods: manual transfer, Stripe, PayPal
- Per-method gateway fee: absorbed, added on top, or taken from the balance
- Top-up bonus tiers and multi-currency display
- Exchange rates that refresh themselves, with a margin
- Add-on framework for gateways, themes and extensions
- Extra landing and client-portal designs installable as theme add-ons
- An installed design can dress your whole public site — home page, blog, FAQ, terms, catalogue and sign-in — and add sections of its own
- Sections a design adds are worded by you, in the same Landing Studio
- Light/dark switch on every public page, remembered per visitor
- Demo mode: a public demo refuses the actions a restore cannot undo
- Reseller child panels on their own domain
- Reseller subscription plans billed from the wallet
- Plan-gated own provider for resellers
- Resellers take payments with their own gateways
- Resellers approve their customers' bank transfers
- Reseller-only mode: sell panels, not services
- Self-serve reseller signup from your landing page
- Public API in the standard SMM format
- Omnichannel CRM with seven channels
- AI agents with a knowledge base, plus automations
- Embeddable web-chat widget
- Tickets, blog, FAQ, news and landing page
- Blacklists for IP, link and e-mail
- Owner and reseller dashboards with charts
- Three client skins and eight landing skins
- English, Spanish and Arabic, light and dark mode
- Full right-to-left (RTL) interface for RTL languages
1.1 Who it is for
RedFamosa is built for the entrepreneur who wants to run an SMM reselling business rather than write one. The typical owner:
- Connects one or more upstream SMM providers and buys services wholesale.
- Adds a markup and sells to end clients through their own branded panel.
- Optionally recruits resellers — child panels that do the same thing one tier down, each with their own domain, branding and clients.
- Optionally charges those resellers a subscription plan (§10) on top of the wholesale margin.
1.2 The three roles
| Role | Area | What they can do |
|---|---|---|
| Owner + staff | /admin |
Full administration: providers, catalogue, pricing, payments, child panels, plans, users, tickets, CRM, settings and reports. Staff get a role with granular permissions, so you can hire an operator without handing over the keys to the business. |
| Reseller | /panel |
Runs a child panel on their own domain. Buys from you at your price, sets their own resale price, manages their own clients, keeps their own CRM inbox, and tops up their balance by paying you. |
| Client | /app |
The end buyer. Tops up a balance, places orders, follows their progress, opens support tickets and automates through the public API. |
1.3 How to read this manual
Chapters 2 to 4 get you installed and configured — read them in order the first time. Chapters 5 to 8 cover day-to-day operation. Chapters 9 and 10 are the reseller business. Chapters 11 and 12 are the integrations: the public API and the CRM. Chapter 13 is the background worker every panel needs, and chapter 14 collects the things that go wrong, with the fix for each.
Throughout the manual, {APP_URL} means the address of your panel as you entered
it during installation, for example https://panel.example.com. Screens are written
as Menu → Sub-menu, matching the sidebar of the admin area. All example
domains, e-mail addresses and keys are fictitious.
public/ folder, open it in a browser and complete the
wizard (§3). Then add a provider and sync its catalogue
(§5), enable a payment method (§8) and
choose how background work runs (§13). Everything else is optional.2. Server requirements
RedFamosa ships with its PHP dependencies and compiled front-end assets already bundled, so the server needs neither Composer nor Node.js. A standard PHP + MySQL hosting account is enough.
PHP
PHP 8.2 or newer (8.3 and 8.4 are supported). The installer compares your version against 8.2.0 and refuses to continue below it.
Required PHP extensions
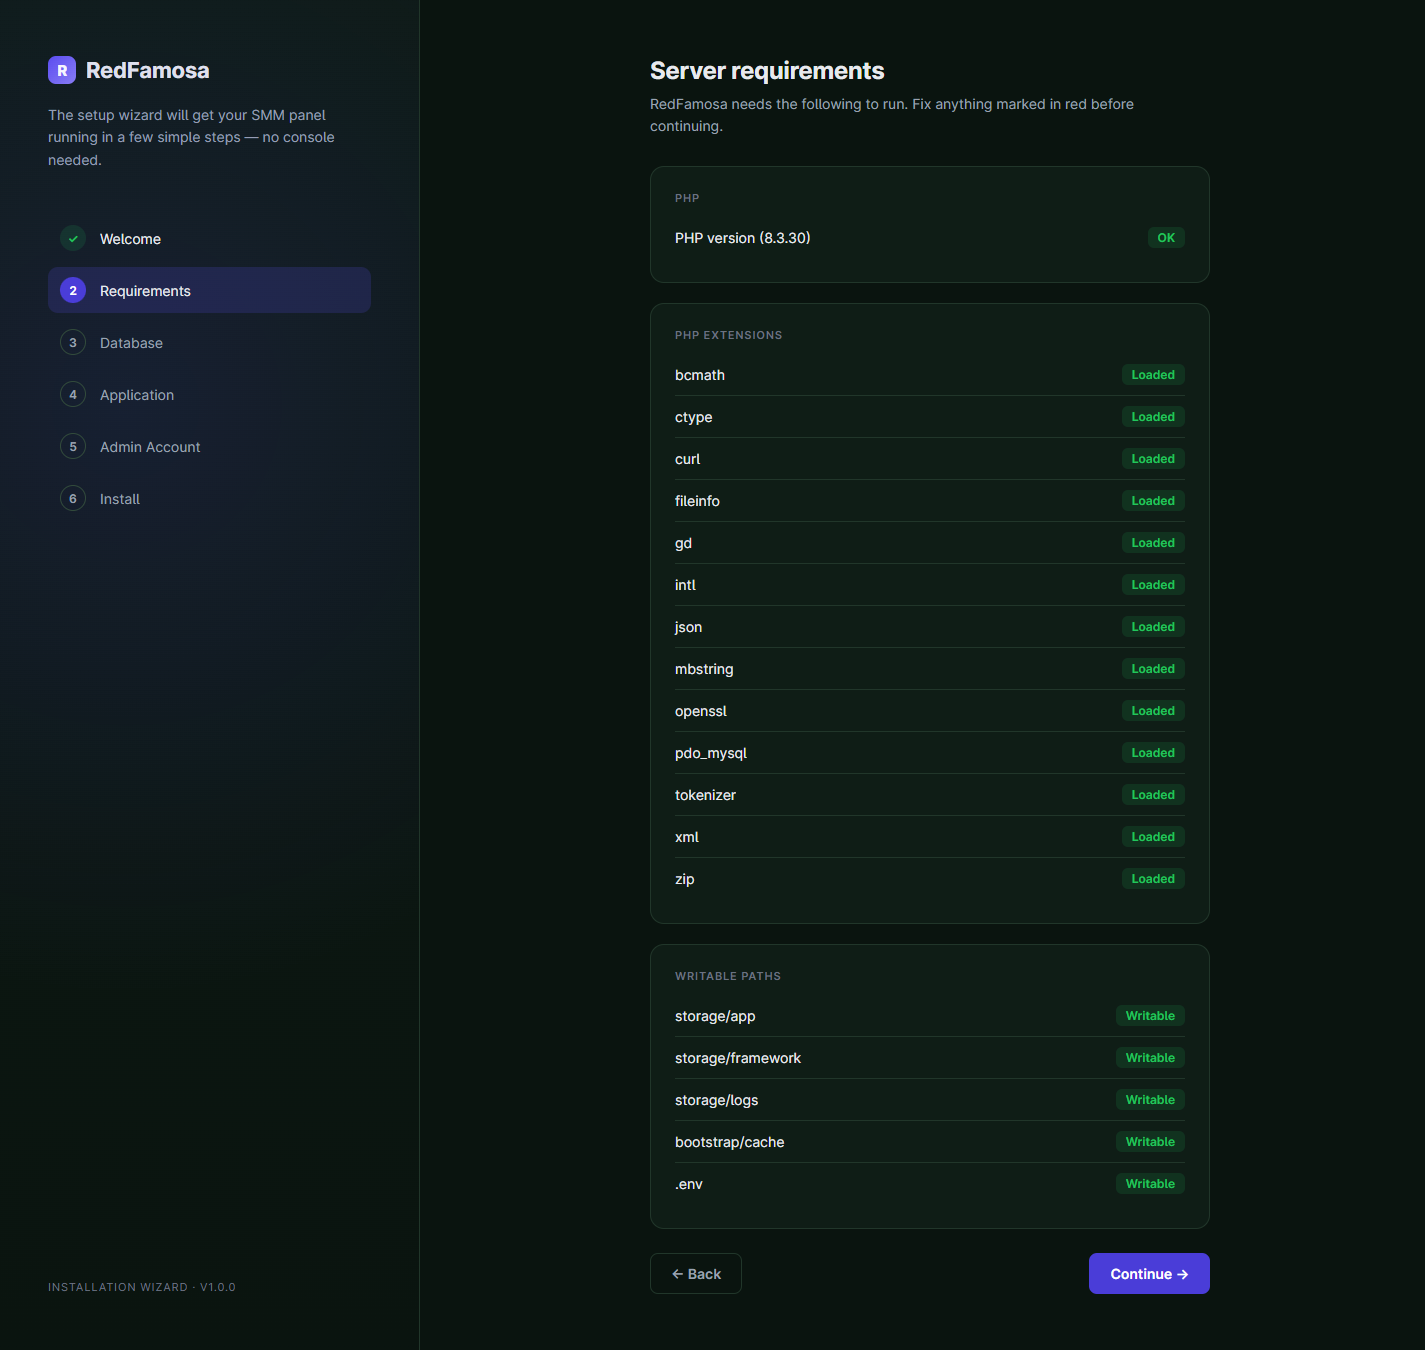
These thirteen extensions are exactly what the installer checks, one row per line on screen:
| Extension | Used for |
|---|---|
bcmath | Exact arithmetic in the wallet ledger and price calculations. |
ctype | Character checks used by the framework and by input validation. |
curl | Outbound calls to providers, payment gateways and webhooks. |
fileinfo | Real MIME-type detection for uploaded files. |
gd | Image processing for avatars and payment proofs. |
intl | Number, date and currency formatting. |
json | Encoding of API payloads and stored settings. |
mbstring | Multi-byte strings and translations. |
openssl | Encryption of provider keys, gateway secrets and channel tokens. |
pdo_mysql | MySQL / MariaDB driver. |
tokenizer | Required by the framework itself. |
xml | Parsing XML responses from some gateways. |
zip | Archive handling used by exports and updates. |
On cPanel these live in MultiPHP Extensions (or Select PHP Version → Extensions). Nearly every host enables all thirteen by default.
Database
- MySQL 8.0+ or MariaDB 10.3+.
- InnoDB storage engine — the default everywhere. MyISAM is not supported: the schema relies on foreign keys and transactions.
- The database user needs
SELECT,INSERT,UPDATE,DELETE,CREATE,ALTER,INDEXandDROPon its own database. On cPanel, "All privileges" covers exactly that. - Start from an empty database — the installer creates every table.
Write permissions
The user that runs PHP must be able to write to these five paths. They are the same five the wizard verifies in step 2:
| Path | Why |
|---|---|
storage/app | Uploads and the installation lock file. |
storage/framework | Compiled views, sessions and cache. |
storage/logs | The application log. |
bootstrap/cache | Compiled configuration and routes. |
.env | The installer writes your settings into this file. If the file does not exist yet, the project root itself must be writable so it can be created. |
On cPanel the PHP user is the account owner, so uploading through File Manager already gives
the right ownership. If a check fails, set directories to 755 and the
.env file to 644.
Web server
Apache 2.4+ with mod_rewrite and AllowOverride All (the cPanel
default), or Nginx with the usual try_files rule for a front controller. The
recommended layout points the document root at the
public/ sub-folder — but if your host does not let you
change the document root (a cPanel main domain locked to public_html, for
example), you do not have to: the product ships a root .htaccess that forwards
every request to public/ automatically. Both layouts are covered step by step in
§3.1.
try_files rule alone is not enough
Several server control panels (aaPanel among them) ship an Nginx template with a rule that catches
every address ending in .js and serves it from disk. One of the panel's addresses is
answered by PHP rather than being a file, so that rule turns it into a 404 and the JavaScript engine
never loads: every screen paints perfectly and no button does anything. One extra block fixes it
— the block, and how to confirm it worked, are in
§14.1. Apache and LiteSpeed need nothing: the
.htaccess files in the download already handle it.../ is the usual case —
and the panel then shows you your server's 403 Forbidden page inside a box. It is
not a fault in the panel, and it is a one-line change for your host:
§14.1 shows how to identify the rule and what to ask for.vendor/ (every PHP package) and
public/build/ (compiled CSS and JavaScript). You never run
composer install or npm install on the server.http://, type the address with http:// in the
wizard: §14.1 explains what breaks when the two disagree.3. Installation
RedFamosa installs through a browser wizard of seven steps. Each step validates before it lets you continue, and tells you exactly what to fix without leaving the screen. A normal installation takes about five minutes, most of it spent creating the database in your hosting panel.
.env configuration file, creates every database table, seeds the data
you choose, creates your owner account and finally writes
storage/app/installed.lock — the file that marks the panel as installed and
permanently closes the wizard.3.1 Prepare your hosting
Do this before opening the wizard. The instructions are written for cPanel because that is what most buyers have; on a VPS the same five points apply with your own tooling.
- Upload the product ZIP to your account through File Manager or FTP, and
extract it. You get a folder containing
app/,public/,vendor/and the rest of the script. - Point the web server at the script. Pick the path that matches your hosting:
- Path A — you can change the document root (subdomains, addon
domains, and most VPS panels): in cPanel → Domains (or
Subdomains), set the document root of the domain to the
publicfolder inside the extracted directory. This is the recommended layout because the application code stays outside the web root. - Path B — the document root is locked to
public_html(typical for a cPanel main domain): extract the whole product directly intopublic_html, so thatpublic_html/app/,public_html/public/and the rest sit at the top level. Nothing else to do — the root.htaccessincluded in the package forwards every request topublic/automatically and refuses to serve configuration files such as.envdirectly. Do not move or merge any folders by hand.
public/— landing anywhere else is the reason most "it does not work" tickets exist. - Path A — you can change the document root (subdomains, addon
domains, and most VPS panels): in cPanel → Domains (or
Subdomains), set the document root of the domain to the
- In cPanel → MySQL Databases, create an empty database and a database user, then add the user to the database with All privileges. Write down the database name, user and password.
- Issue an SSL certificate for the domain (cPanel → SSL/TLS Status → Run AutoSSL) if you have not already.
- Open your domain in a browser. Because the panel is not installed yet, every address
redirects to
/installand the wizard opens by itself.
.env
On the very first request the panel notices there is no .env file, copies
.env.example over it and generates a fresh APP_KEY for you. That is why
the project root must be writable. If you prefer to prepare it yourself, copying
.env.example to .env by hand before the first visit works just as
well.3.2 Step 1 — Welcome
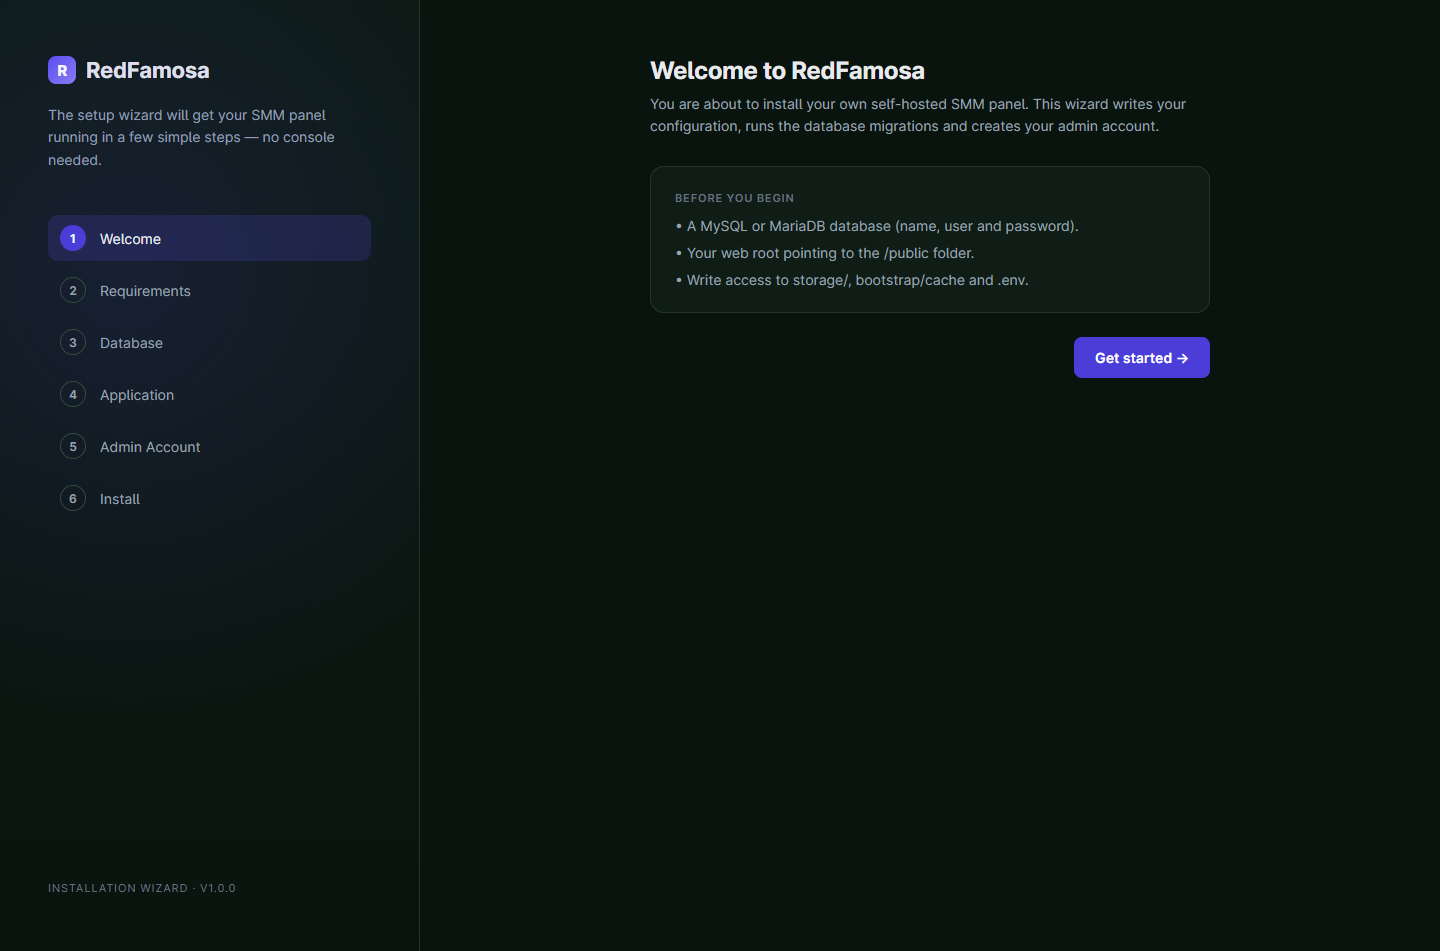
The opening screen states what the wizard is about to do and lists the three things you were asked to prepare. Click Get started to continue.
3.3 Step 2 — Requirements
The wizard inspects the server and shows the result in three blocks: your PHP version, the thirteen required extensions, and the five paths that must be writable. Everything must be green before Continue does anything.
| Failing check | What to do |
|---|---|
| PHP version below 8.2 | Switch the PHP version of the domain in cPanel → MultiPHP Manager (or Select PHP Version), then reload the page. |
| An extension is missing | Enable it in cPanel → MultiPHP
Extensions. On a VPS, install the matching php8.x-* package and restart
PHP-FPM. |
| A path is not writable | Set the folder to 755 and make sure it belongs to the account that runs PHP. On a VPS: chown -R www-data:www-data storage bootstrap/cache. |
.env is not writable | Set the file to 644. If the file does not exist at all, the project root must be writable so it can be created. |
3.4 Step 3 — License
Enter the purchase code or license key you received when you bought the
product. If you bought on CodeCanyon, find it on your Envato Downloads page: click
Download next to the item and choose
License certificate & purchase code — a CodeCanyon code has the form
xxxxxxxx-xxxx-xxxx-xxxx-xxxxxxxxxxxx. If you bought it somewhere else, use the
license key from your account in that store; it may look different, and that is fine —
paste it exactly as you received it. Press Activate; the wizard verifies the
license and downloads the install data the next steps seed the panel from. The
Continue button stays disabled until activation succeeds.
localhost, 127.0.0.1, *.test,
*.local) never count against it, so you can rehearse an installation freely.3.5 Step 4 — Database
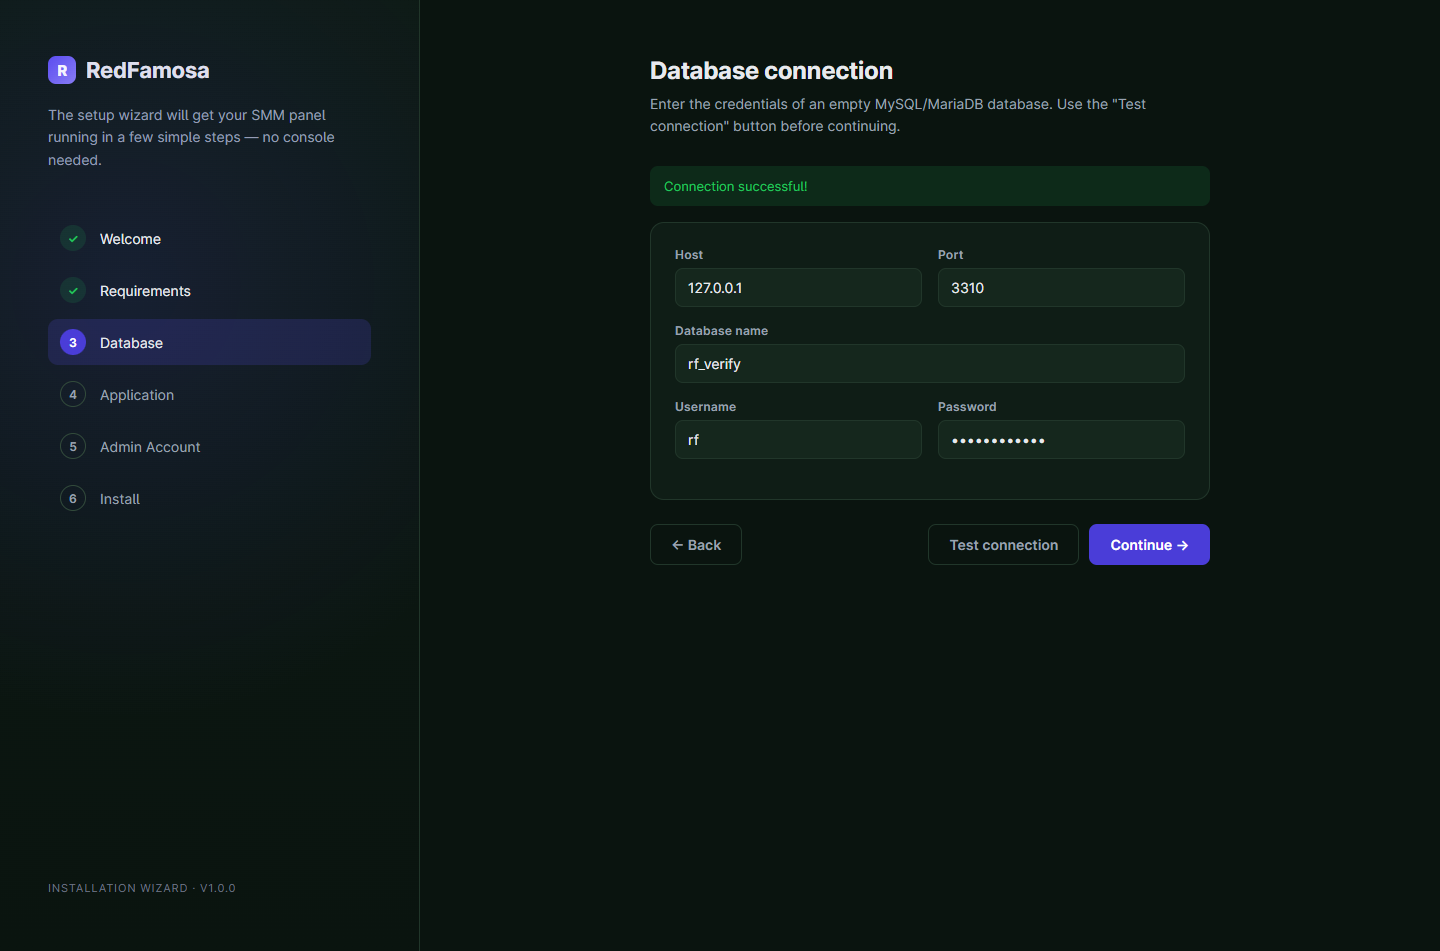
Enter the credentials of the empty database you created. Test connection opens a real connection and reports either success or the exact driver error; the Continue button stays disabled until that test passes, and the server checks the connection again before saving, so a copy-paste mistake cannot get through.
localhost or 127.0.0.1 and the port
3306.localhost on nearly every shared host. Managed platforms sometimes give you a separate database hostname.3306 unless your host says otherwise.myaccount_redfamosa.3.6 Step 5 — Application
Four values that define the panel itself.
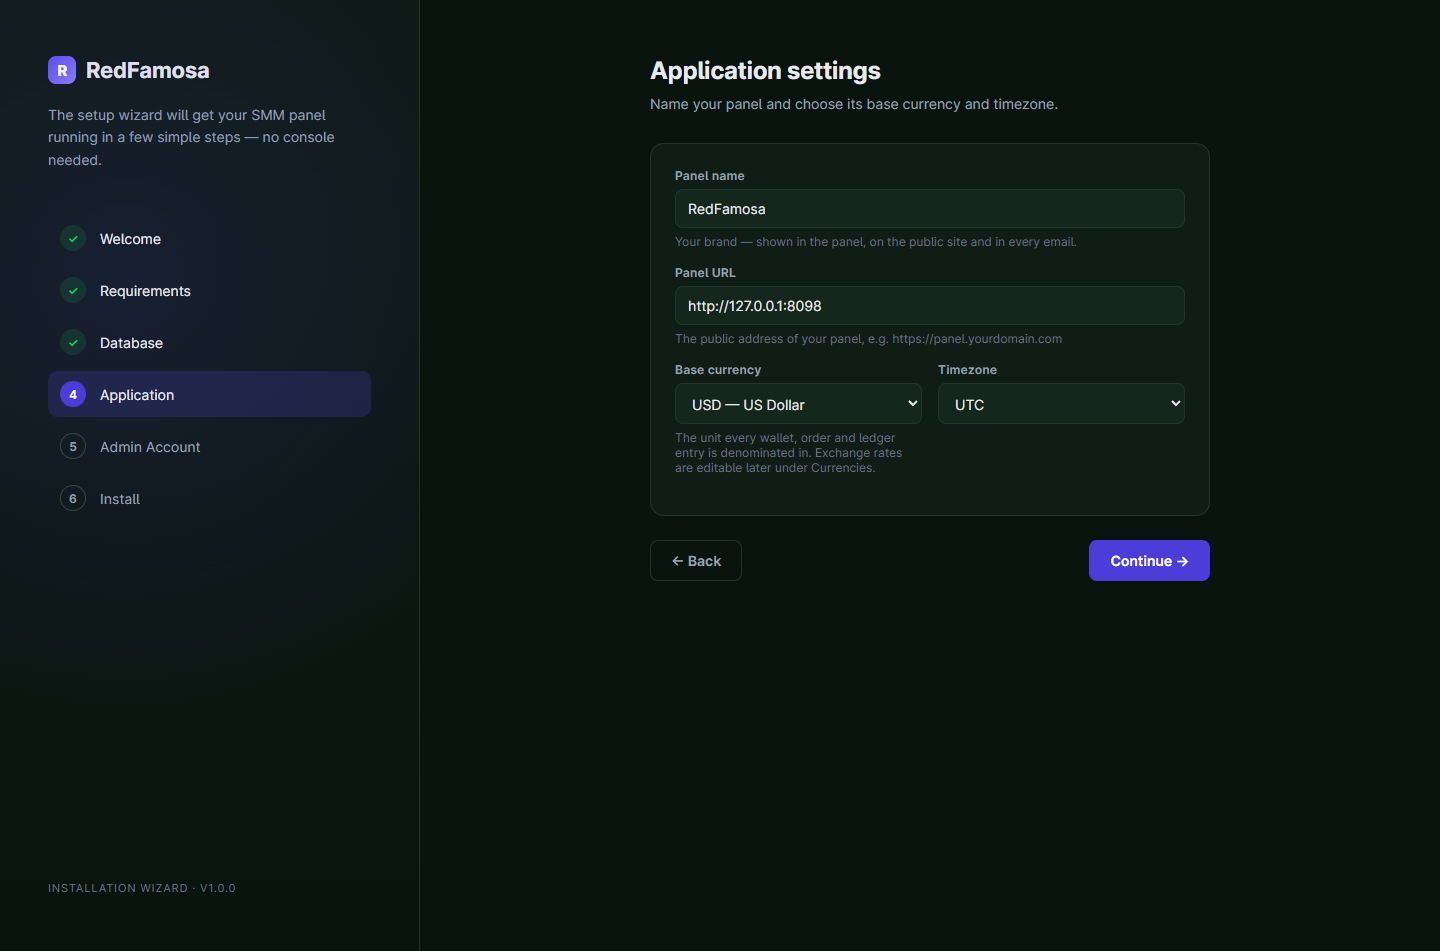
http:// or https:// prefix. Enter the
address exactly as visitors will type it, with no trailing slash.https://panel.example.com. Stored as APP_URL.APP_TIMEZONE. Reports and scheduled work follow it.3.7 Step 6 — Admin account
Create the owner account: the super admin with unrestricted access to the panel.
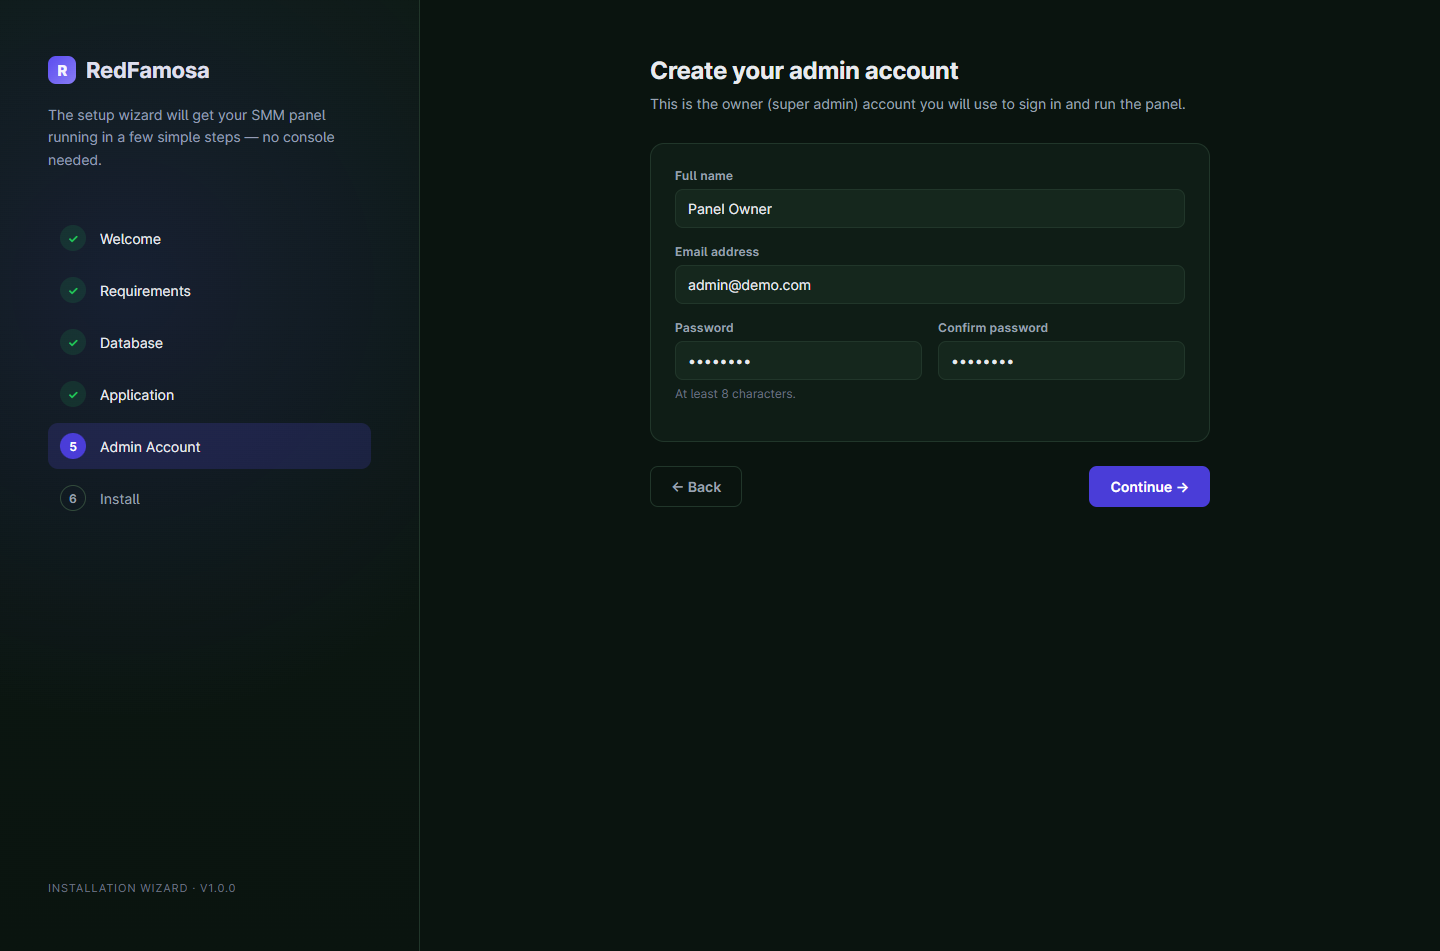
3.8 Step 7 — Install: Production or Demo
The last step asks one question: how much data should the panel start with. Pick a card and press Install now.
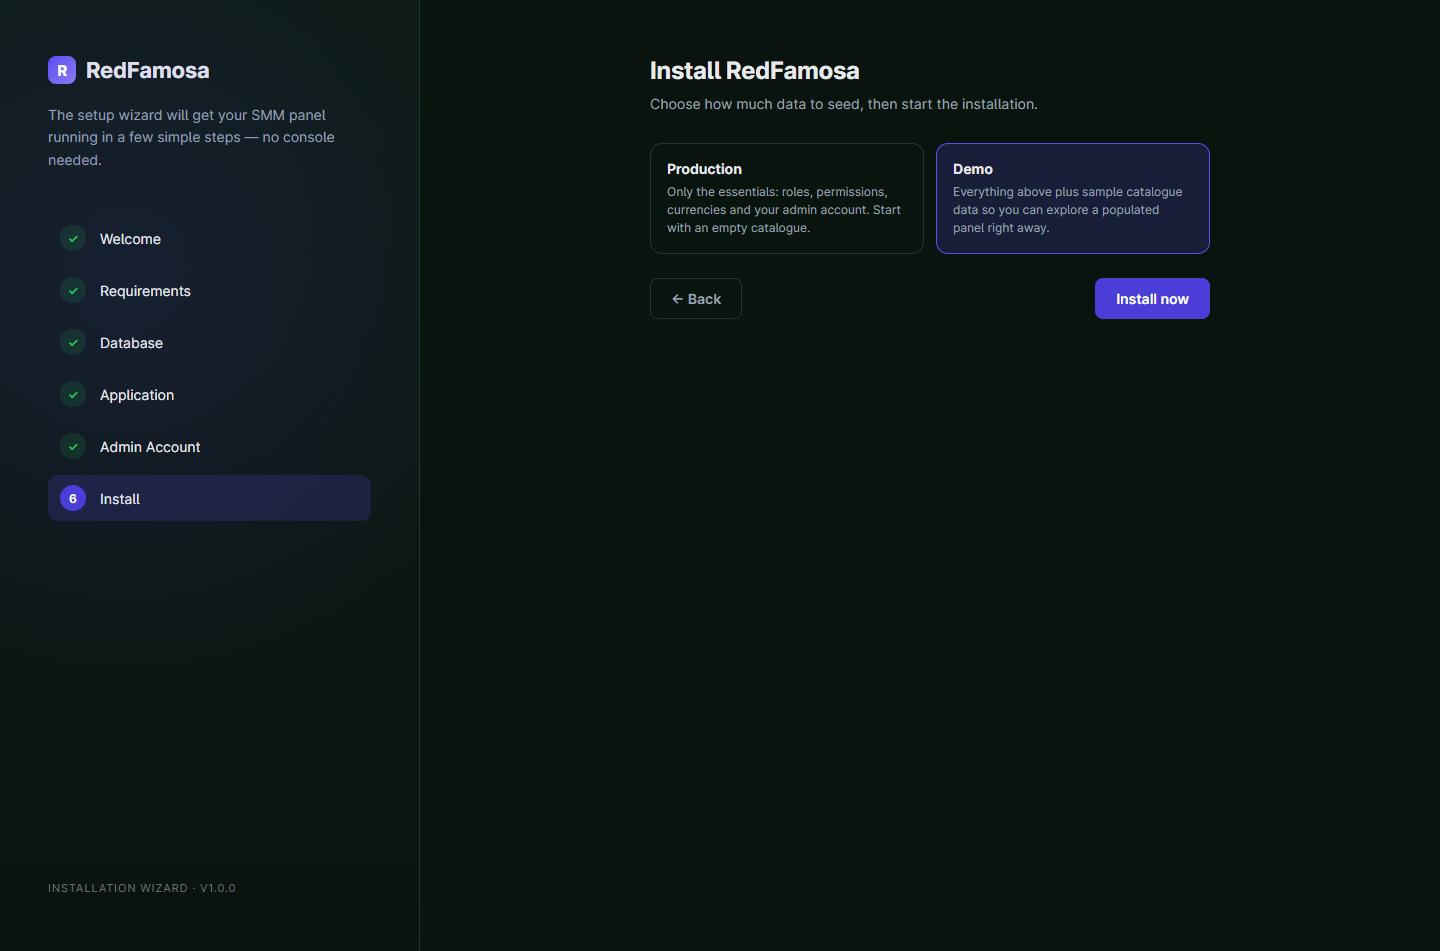
| Mode | What gets inserted | Choose it when |
|---|---|---|
| Production | Only the essentials: roles and permissions, the currency list, the language list with English and Spanish enabled, the platform taxonomy, the default settings, the starter reseller plans, your owner panel with its domain, and your admin account. The service catalogue is empty — you fill it from your own providers. | Any real site. This is the recommended choice: nothing to clean up later, and no invented catalogue to confuse a customer. |
| Demo | Everything above, plus a full sample business: example providers, dozens of categories and services, sample clients and staff, orders in every state including drip-feed, payment methods and bonus tiers, support tickets, blacklist entries, a second panel that acts as a reseller with its own clients and an active subscription, and a populated CRM with channels, labels, quick replies, AI agents and conversations. | You want to explore the product with populated screens, or you are recording a demo. Not for a live site — the sample records are indistinguishable from real ones once you start working. |
While the progress bar runs, the wizard verifies the database once more, creates every table, seeds the data for the mode you chose, creates your admin user, checks the writable paths and finally writes the configuration file and the lock file. When it finishes you land on the confirmation screen.
If a step turns red
The failing step stops the run and prints the reason underneath. Fix the cause and press Try again: the wizard carries on from the step that failed, so nothing that already succeeded is repeated and you never have to start the wizard over. Every step is safe to run twice.
By far the most common cause is the database, and the code in the message says which one it is — the wording after it comes from your server, not from RedFamosa:
| Message contains | What it means | What to do |
|---|---|---|
1045 Access denied |
The username or password is wrong, or the user has no rights on that database. | Go back to the Database step and re-enter them. In cPanel, check the user is added to the database with all privileges. |
1049 Unknown database |
The database name does not exist on that server. | Create the database first, then go back and correct the name. On cPanel it is usually prefixed with your account name. |
2002 Connection refused |
Nothing is listening: the MySQL service is down or on another port. | Ask your host to start MySQL, or correct the port. |
2002 Operation not permitted |
MySQL is running but the server is blocking PHP from reaching it — a firewall or, on CentOS/AlmaLinux/CloudLinux, SELinux. | Try localhost instead of 127.0.0.1 in the Database step first:
on most shared hosting that connects through the local socket instead of a TCP port that is
often closed. On a VPS, your host can run
setsebool -P httpd_can_network_connect_db 1. If the database is on a different
server, add your web server's IP under Remote MySQL. |
dbtest.php next to index.php and open it in your browser — if it
fails too, the fix belongs with your host. Delete the file afterwards.
<?php
try { new PDO('mysql:host=localhost;dbname=YOUR_DB','YOUR_USER','YOUR_PASS'); echo 'localhost OK'; }
catch (Exception $e) { echo 'localhost: '.$e->getMessage(); }
echo '<br>';
try { new PDO('mysql:host=127.0.0.1;dbname=YOUR_DB','YOUR_USER','YOUR_PASS'); echo '127.0.0.1 OK'; }
catch (Exception $e) { echo '127.0.0.1: '.$e->getMessage(); }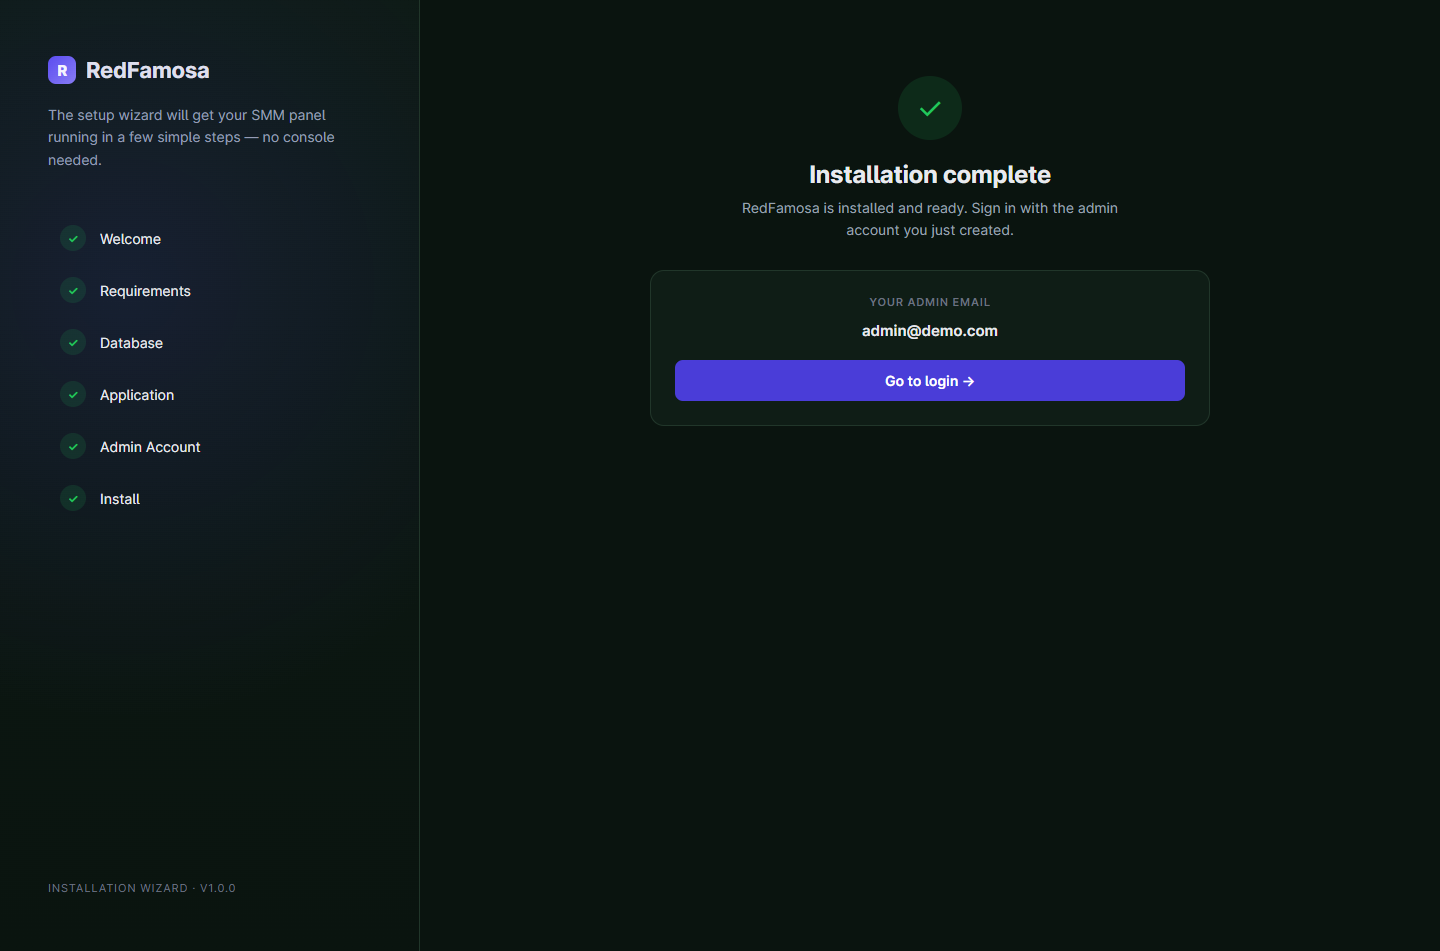
/install redirects to the home page,
because storage/app/installed.lock now exists.What the wizard writes into .env
Only these sixteen values — everything else in the file keeps the documented default and can be changed by editing the file (§4.4):
| Key | Value it writes |
|---|---|
APP_NAME | The panel name from step 4. |
APP_URL | The panel URL from step 4. |
APP_TIMEZONE | The timezone from step 4. |
RF_DISPLAY_TIMEZONE | The timezone from step 4 as well. This one decides how dates are shown to your users, while APP_TIMEZONE decides how the server stores them. The wizard sets both to the same value, so the panel reads correctly from the first minute. |
APP_ENV / APP_DEBUG | Always production and false. |
DB_CONNECTION, DB_HOST, DB_PORT, DB_DATABASE, DB_USERNAME, DB_PASSWORD | The connection from step 3. |
DB_ENGINE | InnoDB ROW_FORMAT=DYNAMIC — the storage engine every table is created with. Leave it alone. InnoDB is required, not preferred: a wallet credit runs inside a transaction that holds the row, so a payment notification delivered twice cannot pay twice, and MyISAM supports neither transactions nor row locks. If your host still defaults to MyISAM, an install without this stops at the first table with SQLSTATE[42000] … 1071 Specified key was too long. It only affects tables being created, so changing it on a working panel does nothing. |
SESSION_DRIVER | database |
CACHE_STORE | file |
QUEUE_CONNECTION | database |
AUTOMATION_MODE | middleware — the setting that works without any server configuration (§13). |
APP_KEY is not written here: it was generated on the very first request, before
the wizard even opened.
3.9 First login
Sign in with the e-mail and password from step 5 and you land in the admin dashboard. On a Production install every counter is zero — that is correct, the panel is waiting for you to fill it.
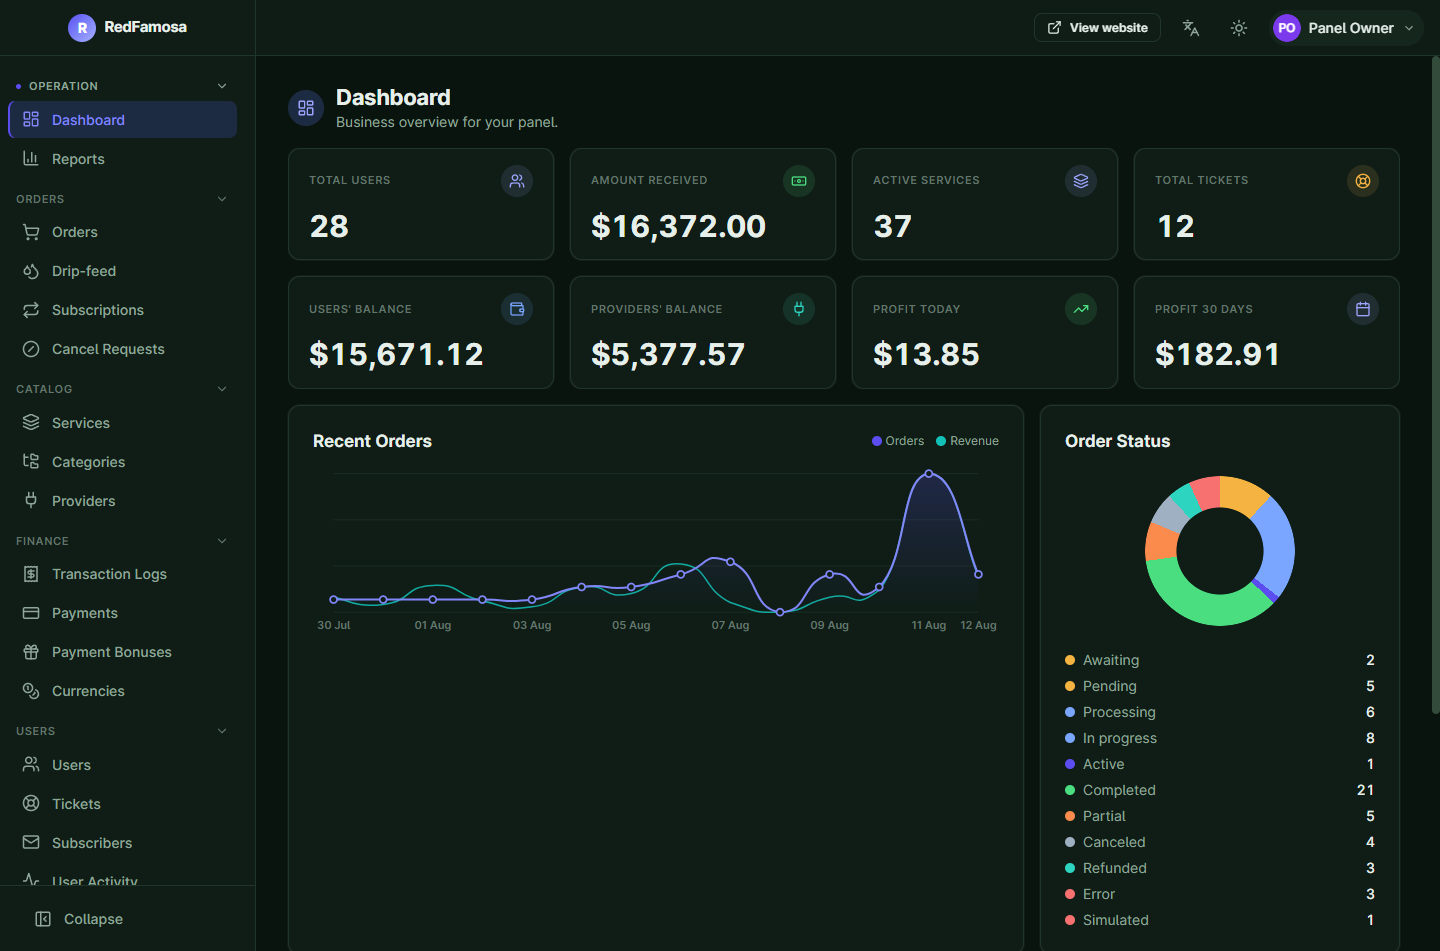
A sensible order for the first hour:
- Add your upstream provider and sync its catalogue — §5.
- Review prices and hide the services you do not want to sell — §6.
- Configure SMTP so account and order e-mail actually leaves the server — §4.2.
- Enable at least one payment method — §8.2.
- Decide how background work runs and confirm it is running — §13.
- If you will sell reseller panels, set the reseller domain variables — §4.5.
3.10 Updating the script
There are two ways to move to a newer release. Back up your database and your
.env file first either way — that step is never optional.
From the panel (recommended)
Admin → System Update applies a release package for you, and needs no SSH at all — it is the way to update on shared hosting.
- Open Admin → System Update. It shows the version you are running.
- Choose the release ZIP exactly as you downloaded it. Nothing is transferred yet — the screen just shows the file name and size.
- Press Upload package. The file travels in small 1 MB pieces with a
live progress bar, so it goes through even on hostings with a strict upload limit — no
php.inichanges needed. When the last piece arrives the server verifies the package and the update starts by itself; if anything is wrong (not a valid release ZIP, a lost piece, an expired session), the screen states the exact reason. Prefer FTP? Copy the ZIP intostorage/app/updates/instead — it then appears under Available packages with its version read from the package itself. - Leave the page open. The update runs in four steps you can watch: the package is extracted and verified, the new code is applied (the replaced code is kept as a backup), the database is migrated, and the caches are cleared. When it finishes, the page reloads itself and confirms the new version.
/update assistant
does the same from its own page.The updater never touches your .env, your storage/, your uploads or
your installed add-ons, and it refuses a package that is not newer than what you have. If a step
fails, the screen offers Roll back to the previous version, which puts the
previous code back.
storage/ —
the one folder no update ever touches — so even an upload that removed lang/
entirely is undone the moment the update finishes. (Releases before 1.7.0 replaced them. If that
happened to you and you updated from inside the panel, your files are also inside the backup the
update kept, under storage/app/updates/backup-<date>/lang/; copy them out
before your next update, as only the most recent backup is kept.)public/storage
arrived as a real folder instead of the expected link. Updating repairs this automatically —
your uploads are kept and start being served as soon as the update finishes. The browser-based
/update assistant performs the same repair.The package list keeps itself honest. A package whose version is already running shows an Installed badge instead of an Update button (an older one shows Older version), and every package has a delete button so you can clear it from the server once applied — no FTP needed.
Code backups. Each update keeps the code it replaced, and the screen lists those backups with the version they hold. Restore puts that code back — the escape hatch when you discover a problem after leaving the screen — and Delete frees the disk space. Restoring never touches your data, settings or uploads. To keep your disk from filling up, only the most recent backup is kept automatically after a successful update; older ones are removed for you.
By hand, over FTP and SSH
Use this when your hosting will not let the updater write to the application folder, or when you simply prefer to do it yourself. It is the same result — you are performing by hand the steps the updater performs for you.
What the release ZIP contains. Unzipping it gives you two folders:
redfamosa/ — the application itself — and Documentation/,
which is this manual and never gets uploaded. Everything below refers to what is inside
redfamosa/.
- Back up first. Export your database, and download a copy of your
.envfile. Nothing here is reversible without them. - Put the site in maintenance mode if you can (php artisan down), so nobody places an order against half-replaced code. On hosting with no SSH, updating at your quietest hour is a reasonable substitute.
- Replace these folders and files — delete the old one on the server and
upload the new one in its place. Overwriting without deleting first also works, but leaves
behind files a release has removed:
Replace Why it matters app/config/database/resources/routes/bootstrap/The panel itself: code, default settings, migrations, screens. lang/
upload over the top — never delete firstThe translations. This one folder is partly yours: languages you added and wording you corrected in Admin → Languages are files in here. Deleting it first removes them; uploading over the top keeps them and still delivers the strings this release introduces. If it has already happened to you, step 6 puts them back. vendor/The one most often skipped. The bundled libraries. Leaving an old vendor/against new code is the usual cause of a blank page or a “class not found” error right after an update.public/build/public/fonts/public/index.phppublic/.htaccessThe compiled styles and scripts. Skip public/build/and the new screens render unstyled.artisancomposer.jsoncomposer.lockpackage.jsonpackage-lock.jsonvite.config.jschangelog.txt.env.exampleRoot files. .env.exampleis only a template — it is not your.envand does not overwrite it. - Never touch these. They are yours, not the package's:
Keep exactly as it is What you lose by replacing it .envYour database credentials and your APP_KEY. Replacing the key makes every encrypted value — provider keys, gateway secrets, messaging tokens — permanently unreadable.storage/Uploaded files, logs and installed.lock. Deleting the lock re-opens the installer on a live site.public/uploads/andpublic/storage/Your logo, avatars, blog images and payment receipts. addons/The add-ons you have installed. - Empty the compiled cache. Delete every
.phpfile insidebootstrap/cache/(keep the folder itself). The package ships it empty; a staleconfig.phpleft there would go on serving the old settings. - Update the database — this is the step that is never optional.
Uploading files is only half of an update: the new code expects tables and columns that only
the migrations create, and until they have run the panel cannot work. You have two ways to run
them, and either is fine:
Every migration in RedFamosa is additive and safe to re-run, so this never destroys data.
Way What to do From your browser
no SSH neededOpen https://your-panel.com/update. The update assistant shows the version on the server, the version the database knows and exactly which changes are pending, and applies them with one button — migrations, translations, add-ons, caches and the background worker included. If you are signed in as an administrator it opens straight away; if you are not, it asks for the update key, a short code insidestorage/app/update.keythat you read with your File Manager or FTP client. The key changes after every successful update.From a shell php artisan migrate --force, then php artisan app:restore-languages (puts back any translation of yours the upload replaced — it says which, and does nothing when there is nothing to put back), then php artisan optimize:clear, and — only if you run a queue worker (automation mode queue, §13) — php artisan queue:restart. A worker is a long-lived process that keeps the old code in memory until it is told to stop. - Bring the site back: php artisan up if you took it down.
- Check that it worked. Open Admin → System Update: the
version at the top must be the one you just uploaded, and it appears in
Update history marked Manual (FTP/SSH). If the number has not changed,
the files did not land where you think they did — the usual cause is uploading a
redfamosa/sub-folder into the application root instead of its contents.
https://your-panel.com/update and press the button. That assistant exists for exactly
this case — shared hosting with a File Manager and no shell. If it is the upload size that
blocks you rather than the shell, copy the ZIP into storage/app/updates/ over FTP and
it appears in Admin → System Update ready to apply, which does the whole
update for you./update arrives inside the files you upload: replace the folders, open
/update, press the button. From this version on, Admin → System
Update does everything for you and you never have to touch FTP again..env or storage/
.env holds your database credentials and your APP_KEY. Replacing the
key makes every encrypted value in the database — provider API keys, gateway secrets,
messaging tokens — permanently unreadable. storage/ holds uploaded files and
installed.lock; deleting the lock file re-opens the installer on a live site.Knowing which version you are on
Admin → System Update shows the installed version at the top, and below it an Update history of every version this installation has run: what it replaced, when, how it arrived and — when the update went through the panel — who applied it.
An update done by hand cannot announce itself: replacing files over FTP runs no application code. So the panel notices instead. The next time somebody opens the admin area, it compares the version in the code with the last one on record and, if they differ, writes the entry nobody wrote, marked Manual (FTP/SSH) and attributed to nobody — which is exactly what happened. The trail therefore stays complete whichever way you update.
4. Configuration
RedFamosa is configured in two places, and knowing which is which saves a lot of searching:
| Where | What lives there | Applies |
|---|---|---|
| Admin → Settings | Everything an operator changes while running the business: branding, e-mail, payment methods, security options, CRM settings. Stored in the database, per panel — each reseller has their own copy. | Immediately. |
The .env file |
Everything the installation needs: database credentials, the panel address, the reseller-domain targets, tuning for background work and for the provider client. One file for the whole installation, no screen to edit it. | On the next request. Restart the queue worker or scheduler if you use them. |
4.1 General settings
Admin → Settings is a single screen with a row of tabs. Changes apply immediately — there is nothing to restart.
| Tab | What you set there |
|---|---|
| General | Site title, support e-mail address, timezone and date format. |
| Branding | Logo (and which variant your public pages print — the dark-ink one, the light-ink one, or Both so it follows the visitor's light/dark choice), favicon, the panel's primary colour — the accent that drives the whole interface — and the console colours: the page background and the cards & sidebar, one colour each for light mode and for dark, every one with a live contrast reading and its own Reset. Saved per panel, so a reseller sets his own; the client portal is not affected. |
| SEO | Meta title, description and the image used when your address is shared. |
| Social media | The profile links shown in the public footer. |
| Analytics | Google Analytics, Tag Manager, Meta Pixel and a free-form snippet. |
| Social login | Google (including One Tap) and Facebook sign-in, with the app credentials. |
| Security & access | See §4.3. |
| Maintenance | Maintenance mode with its own heading, message and a list of IPs still allowed in. |
| Currency | The base currency of this panel. |
| SMTP credentials and the test send — §4.2. | |
| Default setting | Operational defaults: whether visitors may sign up, whether the service list is public, whether the API is enabled, rows per page, reCAPTCHA keys, the ticket limit per client and the average order time shown to clients. |
Where things actually live
Not everything an operator thinks of as "a setting" is inside this screen. The frequent searches:
| Looking for | It is here |
|---|---|
| Allow / block new client registration | Settings → Default setting |
| Base currency of the panel | Settings → Currency |
| Exchange rates and the list of currencies | Admin → Currencies (§8.4) |
| Default language, adding a language | Admin → Languages — a reseller picks which of them their own storefront offers in their Settings → Languages (§9.10) |
| Payment methods and their keys | Admin → Payments (§8.2) |
| Top-up bonus tiers | Admin → Payment Bonuses (§8.3) |
| Blocked IPs, links and e-mails | Admin → Blacklist |
| Outgoing order webhooks | Admin → Webhooks (§11.5) |
| How background work runs, and when it last ran | Admin → Cron Jobs (§13) |
| The public address of the panel | APP_URL in .env (§4.4) — there is no admin field for it |
| Minimum and maximum order quantity | Per service, in Admin → Services — there is no global minimum |
4.2 Email (SMTP)
The panel sends account e-mail, password resets, payment confirmations, ticket replies and the reseller billing notices. Until SMTP is configured, none of that leaves the server. Open Settings → Email:
587 with TLS or 465 with SSL. Avoid port 25 — shared hosts usually block it.tls, ssl or none. Match it to the port.Use Send test before you save your work as done: it sends a real message to the address you type, using the values currently on screen, and reports the exact SMTP error if the server refuses.
4.3 Security
Settings → Security & access holds four controls:
Two more protections are always on and need no configuration: failed sign-ins are throttled automatically (five attempts per minute for a given account and address), and every form is protected against cross-site request forgery.
http:// to
https:// belongs in your web server or in .htaccess, where it is more
reliable. What the panel does need is a matching APP_URL and
SESSION_SECURE_COOKIE=true once you are on HTTPS — see
§4.4.4.4 The .env file
.env sits in the project root, next to artisan — one level
above public/. It is created for you on the first request by copying the fully
commented .env.example that ships with the product, and the installer then fills in
fifteen values (§3.8). Every other setting keeps its
documented default until you edit the file.
This is the part of the product that has no user interface, so it is worth knowing what is in there. Open it with the cPanel File Manager editor (enable "show hidden files" — the name starts with a dot) or over SSH. The file is organised in commented blocks:
| Block | Contains | Touch it when |
|---|---|---|
| Application | APP_NAME, APP_KEY, APP_ENV, APP_DEBUG, APP_URL, locales, APP_TIMEZONE | You move the panel to another address or change its name. |
| Database | DB_* | You move the database to another server. |
| Sessions, cache and queue | SESSION_DRIVER, SESSION_LIFETIME, SESSION_SECURE_COOKIE, SESSION_DOMAIN, CACHE_STORE, QUEUE_CONNECTION | You add Redis, or you serve resellers from sub-domains of one domain. |
| Background work | AUTOMATION_* | See §4.6. |
MAIL_* | You prefer to set SMTP in the file instead of in Settings. | |
| Panel branding and reseller domains | RF_BRAND_PRIMARY, RF_PANEL_*, RF_DISPLAY_TIMEZONE, RF_ROUNDING_DECIMALS, RF_DEFAULT_MARKUP | See §4.5. |
| Upstream providers | RF_PROVIDER_*, RF_BREAKER_*, dispatch and polling batches | See §4.7. |
| Public API | RF_API_*, RF_WEBHOOK_* | See §4.7 and §11. |
| CRM and messaging | CRM_* | You use the omnichannel inbox (§12). |
| Social sign-in | GOOGLE_*, FACEBOOK_* | You want "continue with" buttons on the sign-in page. |
| Logging | LOG_CHANNEL, LOG_STACK, LOG_DAILY_DAYS, LOG_LEVEL | You are diagnosing a problem. Put LOG_LEVEL back to error afterwards. |
| Redis | REDIS_* | You actually have a Redis server. |
| Demo mode | RF_DEMO_MODE | See §4.8. |
The five values that matter most
APP_URLAPP_KEYAPP_DEBUGfalse on a public site. Set to true and any visitor who triggers an error sees file paths and configuration.SESSION_SECURE_COOKIEtrue only when the site really is on HTTPS. Set it on a plain-HTTP site and nobody can stay signed in, because the browser never sends the cookie back.AUTOMATION_MODEAPP_URL is not cosmetic
The panel generates every link, form action and redirect with the scheme written in
APP_URL. If it starts with https:// while the site is still served over
plain http://, the wizard's own buttons and every internal link point at an address
the server does not answer, and the panel looks broken. Use https:// only once the
certificate is really installed. See §14.1..env must never be reachable from the web
It holds your database password and your encryption key. Because the document root points at
public/, the file sits outside it and cannot be requested — which is another
reason the document root must be set correctly. After editing the file, run
php artisan optimize:clear if you have SSH, or simply reload the site.4.5 Reseller domains: the variables with no screen
These three lines are what turn reseller panels (§9) from a
concept into a working feature. There is no admin screen for them — they
can only be set in .env, and they ship empty on purpose, because promising an
address your hosting does not actually serve is worse than not offering the option.
| Variable | What it enables | Example |
|---|---|---|
RF_PANEL_BASE_HOST |
Free sub-domains for your resellers. With panels.example.com, a reseller
called max is served at max.panels.example.com. Leave it empty and
the admin refuses to assign sub-domains at all — it tells you to set this variable
first. |
panels.example.com |
RF_PANEL_IP |
The A record target a reseller publishes to point their own domain at
your server. Needed for apex domains such as example.com, which cannot use a
CNAME. |
203.0.113.10 |
RF_PANEL_CNAME_TARGET |
The CNAME target for the same purpose, normally the host name of your own panel. Empty means the CNAME route is simply not offered. | panel.example.com |
Both DNS targets are printed to the reseller on their own Domains screen, so fill in at least one — otherwise the reseller is told to point their domain somewhere and is given nothing to point it at.
RF_PANEL_BASE_HOST only works if a wildcard DNS record
(*.panels.example.com) resolves to this server and the web server answers
for that wildcard with the same document root as the main panel. On cPanel that means a wildcard
sub-domain; on a VPS, a server_name *.panels.example.com block. A wildcard TLS
certificate is what keeps those sub-domains on HTTPS. RedFamosa never issues certificates
— that is your hosting's job.Two more lines in the same block are worth knowing:
RF_BRAND_PRIMARYRF_DISPLAY_TIMEZONEAPP_TIMEZONE is left at UTC. Set it to the timezone you actually think in, or your "today" will not line up with your working day.4.6 Background work
AUTOMATION_MODE chooses how recurring work runs; the intervals below
choose how often. The three modes and how to set each one up are covered in
§13.
| Variable | Shipped value | Meaning |
|---|---|---|
AUTOMATION_MODE | middleware | middleware, queue or scheduler. See §13.1. |
AUTOMATION_THROTTLE | 60 | Minimum seconds between two runs of the same recurring task. |
AUTOMATION_SYNC_INTERVAL | 3600 | Seconds between automatic provider catalogue syncs. |
AUTOMATION_SCRAPE_INTERVAL | 86400 | Seconds between metadata scrapes of a provider's public page. Deliberately slow: one provider per tick. |
AUTOMATION_AVGTIME_INTERVAL | 3600 | Seconds between recalculations of average delivery times. |
AUTOMATION_SUBSCRIPTIONS_INTERVAL | 3600 | Seconds between reseller-plan billing passes when there is no real cron (§10.7). |
AUTOMATION_MAX_JOBS | 25 | Most jobs a single piggybacked pass may run, so a visitor's page never hangs. |
AUTOMATION_MAX_SECONDS | 10 | Hard time limit for that same pass. |
.env line the installation default rather than the last word. The intervals above
are read from .env only.4.7 Providers, orders and the public API
Sensible defaults ship for all of these. Change them when a provider is slow, when you run a high volume of orders, or when you want the public API to be stricter.
Talking to upstream providers
| Variable | Shipped value | Meaning |
|---|---|---|
RF_PROVIDER_TIMEOUT | 30 | Seconds to wait for a provider's API before giving up. |
RF_PROVIDER_CONNECT_TIMEOUT | 5 | Seconds allowed just to open the connection — a separate budget from the one above. If one provider reports cURL error 28: Connection timed out after 5002 milliseconds while your others work, your server needs longer to resolve DNS or complete the TLS handshake: raise this to 10 or 15 and check the balance again. |
RF_PROVIDER_RETRIES | 2 | Retries after a failed call. |
RF_PROVIDER_RETRY_DELAY_MS | 500 | Milliseconds to wait between those retries. |
RF_BREAKER_THRESHOLD | 5 | Consecutive failures before the circuit breaker opens and the provider is paused. |
RF_BREAKER_COOLDOWN | 300 | Seconds a tripped provider stays paused before it is tried again. |
RF_CATALOG_CACHE_MINUTES | 60 | How long a fetched provider catalogue is cached. |
RF_PROVIDER_PROXY | empty | Optional outbound proxy for provider API calls. Leave empty unless a provider is unreachable from your server. |
RF_PROVIDER_PROXY_BYPASS | empty | Providers that keep being contacted directly even when the proxy is set (comma separated). |
RF_PROVIDER_PROXY at a proxy you control keeps that provider
working. Use RF_PROVIDER_PROXY_BYPASS to list the providers that were always
reachable, so only the blocked one goes through the proxy and your other providers' API keys
never travel through it.RF_BREAKER_THRESHOLD consecutive failures the panel stops calling that provider for
RF_BREAKER_COOLDOWN seconds and keeps working on the rest.Order pipeline
| Variable | Shipped value | Meaning |
|---|---|---|
RF_DISPATCH_BATCH | 25 | Orders sent upstream per dispatch pass. |
RF_MULTISTATUS_BATCH | 100 | Orders queried per multi-status call. |
RF_POLL_MIN_SECONDS / RF_POLL_MAX_SECONDS | 60 / 3600 | The window the panel spaces status checks across: fresh orders are polled often, long-running ones progressively less. |
RF_REFILL_WINDOW_DAYS | 30 | Days a client may request a refill after an order completes (§7.4). |
RF_DEFAULT_MARKUP | 20 | Percentage added over a provider's cost when importing a new service. |
RF_ROUNDING_DECIMALS | 4 | Decimal places kept for prices. Per-unit amounts are tiny, so 4 is the safe default. |
Public API and outgoing webhooks
| Variable | Shipped value | Meaning |
|---|---|---|
RF_API_RATE_LIMIT | 120 | Requests per minute per API key. 0 removes the limit (§11.4). |
RF_API_IDEMPOTENCY_TTL | 1440 = 24 h | Minutes a repeated add request carrying the same Idempotency-Key replays the original answer instead of creating a second order (§11.3). |
RF_WEBHOOK_TIMEOUT | 10 | Seconds the panel waits for your webhook endpoint to answer. |
RF_WEBHOOK_MAX_ATTEMPTS | 5 | Delivery attempts before a webhook is abandoned (§11.5). |
CRM
| Variable | Shipped value | Meaning |
|---|---|---|
CRM_META_GRAPH_VERSION | v21.0 | Graph API version used for WhatsApp, Messenger and Instagram. Change it only when Meta asks you to. |
CRM_EMAIL_INTERVAL | 60 | Seconds between mailbox polls for e-mail channels. |
CRM_TOKEN_HEALTH_INTERVAL | 3600 | Seconds between channel-token health checks. |
CRM_TOKEN_WARN_DAYS / CRM_TOKEN_EXTEND_DAYS / CRM_TOKEN_IG_REFRESH_DAYS | 14 / 21 / 30 | How many days ahead of expiry the panel warns you, tries to extend a token, and refreshes an Instagram token. |
CRM_INBOX_PAGE_SIZE | 25 | Conversations per page in the inbox. |
CRM_MEDIA_DISK | public | Where inbound attachments are stored. |
4.8 Demo mode
RF_DEMO_MODE=false ships in the file and should stay that way on any real site.
Setting it to true does three specific things, all aimed at a public demo you want
strangers to walk into:
- The sign-in page shows quick-login buttons so a visitor can enter without credentials.
- The captcha is disabled, so nobody is stopped on the way in.
- Admin actions that write files are refused, with an on-screen explanation: installing or uninstalling an add-on, saving or deleting a language, applying a system update and restoring an update backup.
That last one is the difference between a demo you can leave online and one you cannot. A demo
hands the admin panel to whoever opens it, and most of what a visitor can do there lives in the
database — so restoring your demo database on a schedule puts everything back. Files are the
exception: an uploaded add-on is PHP that keeps running, and an edited
lang/<code>.json repaints every screen for good. No database restore undoes
either. Everything else stays fully usable, which is the point: settings, orders, tickets, and
enabling or disabling an add-on all work normally, so a visitor still sees the real product.
Your own maintenance is unaffected — commands you run over SSH (updates, migrations,
php artisan app:restore-languages) are never blocked by this.
false unless the site exists purely to be looked at. Note that demo mode is unrelated
to the Demo data option in the installer (§3.8), which
only chooses what gets seeded.5. Providers (upstream SMM)
A provider is the wholesale SMM service you buy from. Your panel is the shop window; the provider does the actual delivery. RedFamosa talks to any provider that implements the standard SMM API — the key + action format, widely known as the Perfect Panel API, that virtually the whole industry has settled on.
5.1 The provider protocol
Every call is a single request carrying your API key and the name of the action:
POST https://provider.example.com/api/v2
Content-Type: application/x-www-form-urlencoded

key=YOUR_API_KEY&action=ACTION[&...additional parameters]
RedFamosa uses these actions against your providers:
| Action | When RedFamosa calls it |
|---|---|
services | When you sync a catalogue — it returns the provider's full service list with IDs, names, rates and limits. |
add | When an order is dispatched. The provider answers with its own order ID, which the panel stores. |
status | To follow a single order. |
multi-status | To follow many orders in one call — the efficient path used by the polling pass. |
balance | To read your credit at the provider, and as the connection test. |
refill | When a refill is requested for an order that lost quantity. |
cancel | When a cancellation is requested for an order not yet delivered. |
services, add, status and balance are
universal. Refill and cancel are per-service capabilities: the catalogue sync reads those flags
from the provider and only the services that really support them offer the buttons to your
clients.5.2 Adding a provider
Go to Admin → Providers → Add provider:
/api/v2.40 means you sell at 1.4× the wholesale price. Individual services can be re-priced afterwards.After saving, open the row's menu and run Test connection. It calls the
provider's balance action, so a success proves both that the URL is right and that
the key is accepted.
5.3 Syncing the catalogue
Sync services on the provider row imports the provider's list into your catalogue. The dialog controls exactly what the sync is allowed to touch:
5.4 Balance, metadata and reliability
Provider balance
The provider list shows your current credit at each active provider, refreshed by the background worker. That is your buying power: when it runs out, orders start failing at the provider even though your own clients paid you. Top it up with the provider directly, and keep an eye on the figure — it is the single most common cause of a panel that "stopped delivering".
Metadata scraping
Many providers publish a public services page with descriptions and average delivery times
that their API does not return. Enable scrape metadata on a provider and give it
that public URL: a background task reads the page on a slow schedule — one provider per
tick, at most once per AUTOMATION_SCRAPE_INTERVAL — and fills in the
description and average time that your clients then see on the order form. The fetch is capped
in time and size and is not allowed to reach private addresses.
When a provider misbehaves
Calls carry a timeout and a small number of retries, and a circuit breaker sits in front of every provider: after a run of consecutive failures the panel stops calling it for a cooldown period and moves on to the others, so one broken provider cannot hold up everybody else's orders. The thresholds are in §4.7.
APP_KEY. They are never returned by the API and
never written to the log. This is also why replacing APP_KEY on a live panel is
destructive: nothing already encrypted can be read back.6. Catalogue
The catalogue is the three-level structure your clients browse: platforms → categories → services. Providers fill it; you curate it.
6.1 Platforms
Platforms are the social networks — Instagram, TikTok, YouTube, Facebook, X, Telegram and so on. RedFamosa ships with twenty-four definitions plus an Other catch-all, created the moment the panel is installed. They do two jobs: they group categories in the admin, and they power the network selector at the top of the client order form.
You do not create platforms by hand. When a category is imported, the panel infers its platform from the category name; anything it cannot place lands in Other, where you can reassign it.
6.2 Categories
Categories sit under a platform and group related services — Instagram Followers, TikTok Views. They are created automatically during a catalogue sync and can be renamed, reassigned or reordered in Admin → Categories. A category name is shared: the same name coming from two different providers is one category, not two, which is what lets you sell the same product from several sources without duplicating your shop.
6.3 Services
A service is what a client actually buys. Manage them in Admin → Services.
| Field | What it does |
|---|---|
| Name | The name clients see. Yours to rewrite — provider names are often unreadable. |
| Category | Where it appears in the storefront. |
| Type | How the order is submitted upstream. See the list below. |
| Cost per 1,000 | What the provider charges you. Filled by the sync. |
| Rate per 1,000 | What you charge. Cost plus your markup; edit it freely. |
| Min / Max | The quantity range accepted. Orders outside it are refused at creation. |
| Provider & provider service ID | Which upstream account fulfils it, and under which ID. |
| Refill | Whether clients may request a refill, within the guarantee window. |
| Cancel | Whether clients may request a cancellation. |
| Drip-feed | Whether the service may be delivered in scheduled instalments (§7.4). |
| Average time | The delivery estimate shown on the order form, from the metadata scrape or typed by you. |
| Description | The detail panel on the order form: what is delivered, quality, guarantees. |
| Status | Active (orderable) or hidden (kept, with its order history, but out of the storefront). |
Service types
The type decides which extra fields the order form asks for and how the order is sent upstream. It is set by the sync from the provider's own type and can be corrected by hand.
| Type | What the client provides |
|---|---|
| Default | A link and a quantity. Almost everything you sell is this type. |
| Package | A link only — the quantity is fixed by the package. |
| Custom comments / custom comments package | A link and the list of comments to post, one per line. The quantity is the number of lines. |
| Mentions (custom list, hashtag, user followers, media likers, with hashtags) | A link plus the source of the people to mention: a list of usernames, a hashtag, another account's followers, or the accounts that liked a given post. |
| Comment likes | A link to the post and the username whose comment should receive the likes. |
| Subscriptions | A profile link plus the rules for future posts: how many units per new post, and the range of posts to cover. |
6.4 Bulk management
A first sync can bring in thousands of services, so the services screen is built for volume. Group the list by category, select rows individually, a whole category, or everything that matches the current filter, and apply one action:
- Activate — make the selection orderable.
- Hide — take it out of the storefront while keeping the record and its history.
- Delete — remove it for good. A service that already has orders is hidden instead of deleted, so order history is never orphaned.
- Re-price — apply a markup to the selection instead of editing rows one at a time.
7. Orders
An order is a quantity of one service against one target link. From creation to completion the whole pipeline runs in the background: the panel dispatches to the provider, follows the order and reports what the provider actually says.
7.1 Placing an order
- The client picks a network from the grid at the top of the form.
- Then a category, then a service. The form shows the description, the average delivery time, the accepted quantity range and the price per 1,000.
- They paste the link and type the quantity; the charge is calculated as they type.
- Optionally they leave a Note for the team — delivery instructions or a reference of their own, up to 500 characters. It is stored with the order and changes nothing about what is delivered; your staff read and edit it in §7.5, and the client sees it again under Order details in their own Orders list.
- Place order validates in one pass: the link and their account against the blacklists, the quantity against the service range, and the charge against their balance.
Clicking the category field once a category is chosen reopens the list with the current choice still shown and ticked, so a client can switch to another one without losing their place; the list has its own search box inside. The × beside the chosen category is what clears it, and it also returns the whole catalogue — use it when a client picked a network first and wants to browse everything again. This is the same in all client designs.
The charge leaves the wallet the moment the order is created — that is what an order in awaiting state means — and the background worker picks it up for dispatch on the next pass.
7.2 Bulk order
Clients who work with many links use the Bulk order tab. One order per line, three values separated by pipes:
service_id|link|quantity
143|https://example.com/profile/one|1000
143|https://example.com/profile/two|2500
207|https://example.com/post/abc|500
Every line is parsed before anything is created. A line with the wrong number of fields, a non-numeric service or quantity, or an empty link is reported with its line number and skipped — the valid lines still go through, so one typo does not cost the whole batch.
7.3 Order states
These are the states an order moves through in the admin. The rule the whole pipeline is built around: an order only becomes Completed when the provider says so.
| State | Meaning |
|---|---|
| Awaiting | Created and paid for; waiting for the next dispatch pass. Nothing has been sent upstream yet. |
| Pending | Accepted by the provider, which returned its own order ID. The panel is now polling it. |
| Processing | The provider reports it is working on the order. |
| In progress | Delivery has started. |
| Active | A drip-feed parent whose instalments are still being released. |
| Completed | The provider confirmed full delivery. |
| Partial | Part of the quantity was delivered and the rest will not be. The undelivered portion is refunded to the wallet. |
| Canceled | Cancelled before delivery. The charge is credited back to the client's wallet. |
| Refunded | Refunded by an administrator after the fact. |
| Error | The provider rejected the order, or the service no longer exists. The provider's own message is stored on the order so you can see why. |
| Simulated | A manual marker meaning "this was never really sent upstream". Only an administrator can set it. |
The public API speaks a slightly different vocabulary, because API clients expect the standard SMM status names. The panel translates on the way out:
| Internal state | Returned by the API |
|---|---|
| Awaiting, Pending, Simulated | Pending |
| Processing | Processing |
| In progress | In progress |
| Active | Active |
| Completed | Completed |
| Partial | Partial |
| Canceled, Error | Canceled |
| Refunded | Refunded |
7.4 Refill, cancel and drip-feed
Refill
When a service has refill enabled and the delivered count later drops, the client gets a
Refill button on the order row for as long as the guarantee window lasts
(RF_REFILL_WINDOW_DAYS, thirty days as shipped). The request is forwarded to the
provider and its refill reference is stored, so the refill can be followed separately from the
original order.
Cancel
When a service has cancel enabled, a client — or you, from the admin — can ask for cancellation while the order is still undelivered. The request goes upstream; on confirmation the charge is credited back to the wallet as a new ledger entry. Cancellations that the client asks for arrive in Admin → Cancel Requests.
Drip-feed
Drip-feed spreads a delivery over time instead of dropping it all at once — the natural way to grow an account. On a drip-feed service the client sets:
The client pays the full amount once, when the parent order is created. From then on the background worker releases one child order per interval, each drawing its share from the amount already paid — no further debit is ever taken. The parent stays Active and shows overall progress; it becomes Completed when the last run has been released. Everything drip-feed related is listed under Admin → Drip-feed.
middleware mode that machinery only moves when someone visits the site, so a panel
with no traffic at 3 a.m. releases its 3 a.m. run late. If you sell drip-feed seriously,
use scheduler or queue mode (§13).7.5 Admin order management
Admin → Orders lists every order in your panel with filters by status, service, provider, client and date. From a row you can open the order, read the provider's raw response, retry a dispatch, and edit the status by hand.
The edit window carries two separate note boxes and they are not interchangeable. Note / API response is the operational one: your provider's last answer is written there automatically, and a successful dispatch clears it. Client note is what the customer typed on the order form (§7.1); nothing automatic ever touches it, and you may edit it to record what was agreed. The client sees the latter under Order details.
8. Billing
RedFamosa is prepaid. A client adds funds, and orders spend from that balance. Every movement — deposit, bonus, order charge, refund, adjustment, reseller margin, plan charge — is a line in a ledger.
8.1 The ledger
There is no editable "balance" column that could drift out of step with reality. A balance is the sum of that wallet's ledger entries, and entries are only ever appended — never edited, never deleted. That single decision is what makes the money in the panel auditable: you can always answer "where did this figure come from" by reading the lines.
| Entry type | Created when |
|---|---|
deposit | A top-up is confirmed, manually or by a gateway. |
bonus | A top-up qualifies for a bonus tier (§8.3). |
order_debit | An order is created. |
order_refund | An order is cancelled or partially delivered. |
reseller_cost_debit | A reseller's client orders: the reseller pays you your price. |
reseller_margin | The difference the reseller keeps on that same order. |
manual_adjust | An administrator corrects a balance, with a reason. |
chargeback | A confirmed payment is reversed. |
plan_charge / plan_refund | A reseller subscription is billed or refunded (§10). |
You read the ledger in Admin → Transaction Logs; clients see their own
under Transactions in their area. To correct a balance, do not look for an editable
field: use the balance adjustment on the user, which writes a manual_adjust entry
with your reason attached.
8.2 Add Funds and payment methods
Payment methods live in Admin → Payments, where each one is a row you create, configure and enable. Three are available:
pk_ and which with sk_,
what live and sandbox do, and so on. Gateways you install as add-ons describe
their own fields the same way. When you edit a method that already has credentials saved, every
box opens empty on purpose and reads Leave blank to keep the current value: fill in only
the ones you want to replace.Fees: who pays them
Every payment method has a Fee % and a Fixed fee, and next to them a Who pays the fee setting that decides what those numbers actually do. Take a 10.00 deposit with a 1.00 fee:
A second setting, How the client sees it, decides whether the customer sees the fee as its own line before paying (Itemised) or only the final amounts (Included). Either way they always see the total they are about to be charged, and the deposit receipt lists Deposit, Payment fee, Total paid and Total credited separately.
Manual / bank transfer
The client picks the manual method, enters an amount, uploads a proof of payment and submits. The deposit waits for you: you review it in the admin and approve or reject it, and approval is what credits the wallet (plus any bonus). You configure the instructions shown before the upload — bank details, a QR image, whatever your customers need — and you can attach an image to them.
Stripe
Card payments through Stripe Checkout.
In your Stripe dashboard, add an endpoint pointing at
{APP_URL}/api/webhooks/stripe.
PayPal
The PayPal webhook endpoint is {APP_URL}/api/webhooks/paypal.
8.3 Payment bonuses
Admin → Payment Bonuses is where you reward bigger top-ups. A tier is three things: the payment method it applies to, the amount from which it applies, and the percentage to add.
Bank transfer   from  50   +5 %     a 50 top-up credits 52.50
Bank transfer   from 100  +10 %     a 100 top-up credits 110.00
The bonus is granted when the deposit is confirmed — on approval for a manual payment, on
the gateway's confirmation otherwise — and it is written as its own bonus
ledger entry, so the deposit and the gift you added to it never blur together in the accounts.
8.4 Multi-currency
The base currency you chose during installation is the currency of the ledger: every balance, charge and refund is recorded in it, and it is the only one that matters accounting-wise. Clients may nonetheless read the panel in another currency: they pick a display currency in their profile and every amount is converted for display only.
Admin → Currencies is where the list lives. Each currency carries a rate to base: how much one unit of that currency is worth in your base currency. Your base currency is pinned at 1 and cannot be switched off once there are ledger entries.
RedFamosa ships approximate rates so a fresh install is usable on day one, expressed against whichever currency you picked in the installer — install in dong or in naira and the whole table is quoted in dong or in naira, with your own currency sitting at 1. From there you have two ways to keep them honest, and you choose per currency.
Automatic. Switch Auto update on for a currency and the panel refreshes its rate from a public market feed every six hours — no API key, no account, no configuration. The Updated column states when each rate last moved, and Update rates now fetches immediately if you would rather not wait. If the feed cannot be reached the panel changes nothing and says so; a stale rate is safer than a wrong one, and a currency the feed does not quote simply keeps the rate you set by hand.
Manual. Leave Auto update off and your number is final. That is the right choice when you deliberately sell at a rate of your own, or price in a currency no feed quotes. Your base currency is never auto-updated: it is pinned at 1, because it is the unit everything else is measured against.
Exchange margin. The single percentage above the table is applied on top of every automatic rate, in your favour. At 2 %, a client paying in that currency pays about two percent above the market rate — the cushion that covers the gap between the moment they top up and the moment you pay your provider. Leave it at 0 to track the market exactly.
Currencies that have no cents
Some currencies have no fractional unit at all — the Vietnamese dong, the Japanese yen,
the Korean won, the Indonesian rupiah, the Chilean peso. There is no such thing as half a dong, so
those are always written as whole numbers: ₫128,205, never
₫128,205.13. The ones listed above already know it. If you add such a currency
yourself, tick This currency has no cents on it.
It is deliberately a yes/no and not a number of places. How many decimals your panel shows is one choice for the whole installation and lives in Settings → Currency; whether a currency has any is a fact about the money, and that is the only thing this box states. Every currency that does have cents keeps following your global setting exactly as before.
Currencies whose symbol goes after the amount
Most currencies lead with their symbol the way the dollar does ($100), and a
handful trail it: Vietnamese is written 100₫, Polish 100 zł.
Tick The symbol goes after the amount on a currency and every figure your panel
prints in it — wallets, prices, orders, invoices, the customer portal — follows.
The Reads as column in the list shows you exactly how each currency will look, so
you can check the whole table at a glance.
Five currencies that ship with the product already trail their symbol: VND, PLN, RON,
RUB and UAH. If you are updating from an earlier version these are
corrected for you; every other currency keeps the leading symbol it has always had, and a currency
whose symbol you edited yourself is never changed. The euro is deliberately left leading, because
both €100 and 100 € are current depending on the country
— set it whichever way your market writes it.
When a payment method is not ready
Admin → Payments checks each method and prints what is wrong next to it, in red, so you find out instead of your customer. Two of those checks are about currency, and both describe something that looks perfectly fine on your screen:
- The gateway can only charge in a currency you have not added. A regional processor settles in its own money. If that currency is not in your list there is nothing to convert with, and the amount would be collected one-for-one — a 5.00 top-up asking the customer for 5 dong instead of 128,205. Add the currency with its real rate.
- The currency is there, but its rate is still 1. Same outcome, one step later: 1 is the value the form starts at, not a rate. Set the real one.
A gateway you installed as an add-on can add its own checks here too — a bank code it does not recognise, an account number that cannot be right — so read this column after setting one up. A method with nothing printed under its name has passed.
Letting a customer choose the currency for one payment
The display currency in a customer's profile changes everything they see — prices, orders, balance. That is more than someone needs when all they want is to pay this one top-up in their own money. So the Add Funds page offers the choice at the till: a row of currency buttons above the amount, and the minimum, the fee summary and the button all follow the one they press. Their wallet is still credited the same value in your base currency, and their profile is untouched.
Two things have to be true for a currency to appear there, and both are yours to arrange:
- The gateway states which currencies it settles. The regional processors do
— Korapay, Paystack, Flutterwave, PhonePe and their kind — and their setup form has a
Currencies field where you enter the ones your merchant account was approved
for, comma separated (for example
NGN,GHS,KES,ZAR). Card processors such as Stripe and PayPal, and offline methods such as a bank transfer, do not declare a list; those keep charging the customer's own display currency, exactly as before. - You activated the currency in Admin → Currencies, with a rate. Without a rate there is nothing to convert the wallet credit from, so a currency your gateway supports but you have not activated is simply not offered.
If only one currency passes both tests there is nothing to choose, so no buttons are drawn. And when the customer's own currency is not one the gateway can take, the form is priced in the currency the gateway will really charge — the amount label names it, so what they read is what they are billed.
Your resellers get the same screen when they top up their balance with you.
8.5 Approving offline deposits
A card gateway confirms its own payments. A bank transfer, a mobile-money payment or any other offline method cannot: someone has to check the money arrived and release the balance. Those deposits wait in Admin → Finance → Deposits.
Each row shows the client, the method, the amount, the reference and — when the client sent one — a link to the proof of payment they attached. Approve credits their balance immediately, applying any matching top-up bonus. Reject marks the deposit as failed and credits nothing. An already approved deposit cannot be reversed from this screen; that is a wallet adjustment.
The menu entry carries a badge with the number still waiting, and the badge drops as soon as you settle one. Deposits taken by a reseller through their gateway are approved by the reseller, in their own panel — see §9.9.
8.6 Notifications
Every account — yours, your staff's, your resellers' and your clients' — has a bell in the top bar. The badge counts what is unread; opening the bell previews the latest, and clicking one takes you to the screen it is about and marks it read. View all notifications opens the full history, where you can filter by unread, mark items read one at a time or all at once, and delete them.
What arrives there:
These do not replace the emails: the ones that were emailed before are still emailed, and now also appear in the bell. Email templates stay editable in Settings → Email templates.
RF_NOTIFICATIONS_POLL=0 to your .env (or set any other number of
seconds), then clearing the cache with php artisan optimize:clear. With polling off the
badge simply updates as you move between pages.9. Resellers (child panels)
A reseller gets a panel of their own: their own address, their own name and colours, their own clients, their own catalogue prices, their own CRM inbox. To their customers it is a product, not a page of yours. Technically it is a child panel inside your installation, and the isolation is enforced at the database level — a reseller cannot read your data or another reseller's.
This chapter covers the reseller as a panel. Charging them a monthly fee for it is chapter 10.
9.1 The price chain
Four prices stack, and each participant only ever sees the two that concern them:
Provider cost        what you pay your upstream provider
  + your markup
= Owner price        your sale price
  + plan catalogue markup   (the cut attached to the reseller's plan, see 10.2)
= Reseller cost      what the reseller pays you per order
  + reseller margin
= Client price       what the reseller's own client pays
When a client of a reseller places an order, three things happen in one transaction:
- The client's wallet is debited at the reseller's price.
- The reseller's wallet is debited at their cost — your price, plus the plan's catalogue markup if their plan carries one.
- The difference stays with the reseller as their margin, recorded as its own ledger entry.
9.2 Creating a child panel
Admin → Resellers → Resellers lists every child panel with its plan, subscription state, wallet balance and domains. Create reseller provisions everything in one action — the panel, its administrator account with the reseller role, and optionally their first subscription:
max becomes max.panels.example.com. Requires RF_PANEL_BASE_HOST — without it the admin refuses to assign a subdomain and tells you which variable to set (§4.5).From the same screen you can later adjust a reseller's balance, register a payment they made you, change their plan, edit their branding, or deactivate the panel.
9.3 Domains and SSL
A child panel can be served in two ways, and the reseller sees both on their own Domains screen:
| Route | How it works | Requires |
|---|---|---|
| Platform subdomain | You give them name.panels.example.com. Nothing for them to configure; it
works the moment you assign it. |
RF_PANEL_BASE_HOST, a wildcard DNS record and a wildcard certificate on
your side. |
| Their own domain | They add the domain in their panel and point its DNS at your server — an A record
to RF_PANEL_IP for an apex domain, or a CNAME to
RF_PANEL_CNAME_TARGET for a sub-domain. The panel gives them a TXT record to
publish, checks it, and activates the domain once it verifies. |
At least one of the two DNS targets set in .env, and their plan allowing a
custom domain. |
Requests are routed by the Host header: the panel resolves which child panel owns
the incoming host and serves that panel's branding, catalogue and prices.
9.4 Margin management
The reseller sets their own selling prices from Margins & Pricing in their panel — if their plan includes that module (§10.2). They can set a default margin over their cost for everything, override it for a whole category, and override it again for a single service. The most specific rule wins: service, then category, then the default.
Their clients never see your price, the provider's cost or anything else from upstream. They see one price, the reseller's.
Commission on own-supply services
A reseller on a plan with own providers (§9.7) sells two kinds of services: ones drawn from your catalogue, and ones imported from their own provider. The base commission applies to both. When the reseller saves a percentage commission — from Margins & Pricing, from My Services or from the welcome prompt on their first login — the panel recalculates the sale price of every service from their own provider and stores the result. From that point on their own catalogue reflects the same margin as the platform catalogue.
Two things are deliberately left alone:
- A service the reseller re-priced individually (a per-service override in Margins & Pricing). A manual decision outranks a default, so the commission does not overrule it.
- A service whose sale price no longer matches the markup that was set at sync time. If the reseller edited a price by hand at some point, the panel treats it as a decision and leaves it as-is.
Price rounding
The Price rounding card at the bottom of Margins & Pricing lets the reseller choose how many decimal places are applied when their provider catalogue is synced or re-priced. The Decimal places selector accepts 1–4. Choosing 4 keeps the most precise result (e.g. 1.5000); choosing 1 rounds more aggressively (e.g. 1.5). Once chosen, click Save. When no choice has been made, the panel inherits the platform-wide setting configured in Admin → Settings → Currency.
9.5 Reseller balance
A reseller pays you the same way a client does: they top up their wallet through the payment methods you have enabled, and every order their clients place draws from it in real time. You can also register a payment manually from the reseller's row when they pay you by transfer.
9.6 Their own payment gateways
A reseller can collect from their own customers with their own gateway accounts, so the money arrives directly in their Stripe, PayPal or bank account and never passes through yours. They set it up in their panel under Finance → My Payment Methods, with the same form you use in Payments: driver, display name, minimum and maximum, fees, and the gateway credentials.
Each panel only ever sees its own methods. Yours are invisible to every reseller, and one reseller can never see or edit another's. Credentials are stored encrypted, exactly like yours.
Only the reseller account owner reaches this screen: it cannot be delegated to a team seat, the same as every other control that moves money. Bank-transfer methods can carry an instructions image (a QR code or account details) shown to their customer at checkout, just like yours.
This is not the same as Add Funds in the reseller panel, which is how the reseller pays you through the gateways you enabled for them (§9.5). Two different directions of money, two different accounts.
9.7 Reseller-only mode
If your business is selling panels rather than services, switch on Reseller-only mode (no end customers on this platform) in Settings → Default setting. Your own client area then closes completely: the signup page is off, and existing client accounts can no longer sign in — they are told the platform has no client accounts, and a session that was already open is ended on the next page they open.
Your resellers are not affected in any way: their storefronts keep accepting signups and their customers keep signing in and ordering as before. Your staff and your reseller account owners sign in as usual, since neither is a customer of the platform.
Your public pages follow the mode on their own. The buttons that invited a visitor to open an account — on the landing page, and on the public service list if you publish one — stop offering one, because there is no account for them to open. If you also have Let visitors sign up as resellers on (§9.8) they point at that page instead, which is the one road that leads somewhere. With both switched off, the service list simply shows your prices and asks for nothing.
9.8 Self-serve reseller signup
By default a reseller only exists if you create one (§9.2). Turn on Let visitors sign up as resellers in Settings → Default setting and visitors can buy a panel themselves from a public page: they choose one of your public plans, pick their subdomain, create their account, and land inside their own panel with your catalogue already in it.
The price buttons on your landing page point at that page automatically, with the plan the visitor clicked already selected. Only plans marked public and active in §10.1 are offered, and a plan that is neither cannot be requested by hand either.
- A plan with a free trial starts the trial straight away and the new reseller goes to their dashboard.
- A paid plan without a trial (only offered here when your plan list has no free tier — see the fail-open note in §10.8) creates the panel locked: the new reseller lands on their Plan & Billing screen, where they add funds and pay the first period to activate it — the same billing engine that renews every other subscription (§10.4). There is no separate card checkout to configure, and a panel nobody has ever paid for never operates on credit.
The page is off until you switch it on, and it is never shown on a reseller's own storefront: a reseller sells services, not memberships of your platform.
Your existing customers get their own door. While the signup is open, every logged-in customer sees a Get Your Own Panel entry in their dashboard sidebar. It runs the same signup on their existing account — no second registration, no new email. The page opens with a short “How it works” and your live plans (the pricing and features exactly as you configured them under Admin → Plans); the customer picks one, names their panel and claims a subdomain. Unlike the public page, every public plan is on offer here — this customer already has a wallet, so a paid plan simply follows the funds-first rule: the review step shows the plan price next to their current balance, the first period is charged from the balance the moment the panel is created, and when the balance does not cover it the conversion is blocked with an “Add funds first” shortcut instead (a plan with trial days starts on its trial, as configured). Nothing is created until then: the review step first shows the panel name, the full web address, the starting plan and the money involved, and states plainly that the customer account becomes a reseller account managed from the Panel area — only the explicit “Yes, convert my account” creates the panel, with the current wallet balance and details carried over. A customer who would rather keep that account as a customer account gets a link on the same page to sign out and register a separate reseller account instead. A customer who already owns a panel is simply sent to it.
9.9 Approving their customers' transfers
A card gateway confirms itself, but a bank transfer or a mobile-money payment is confirmed by a person: someone has to check the money arrived and release the balance. When the gateway belongs to the reseller (§9.6), that person is the reseller — the money went to their account, so only they can see it landed.
They do it in their panel under Finance → Customer Deposits, which lists every deposit their clients started, filtered by status and searchable by client. Each row shows the amount, the method, the reference and a link to the proof file the client attached. Approve credits that client's balance immediately; Reject marks the deposit as failed and credits nothing. A deposit that has already been approved cannot be reversed from here — that is a wallet adjustment, not a click.
The screen only ever shows that panel's own deposits, and only the reseller account owner reaches it. Your own Deposits screen is unchanged and keeps showing yours.
On the customer's side, a deposit that is still pending keeps an Attach proof button in their payment history, so the receipt can be sent after the transfer is actually made — and replaced while the deposit is still pending. Once it is approved or rejected, the proof is fixed.
9.10 The languages their storefront speaks
A language in RedFamosa is two things: a row in the list under Admin → Languages, and a translation file inside the installation. That file is shared by every panel, so installing and translating languages stays with you: if a reseller could edit it, their wording would replace yours and every other reseller's.
What each reseller does decide is which of your languages their own panel and their customers' storefront offer, and which one a first-time visitor lands on. They set it in their panel under Settings → Languages: they tick the ones they want and pick a default. A reseller selling in one market can offer just that market's language instead of your whole list.
| Setting | What it does |
|---|---|
| Languages you offer | The rows their language switcher shows. Leave everything unticked to offer all of yours — which is how every panel behaves until a reseller changes it. |
| Default language | What a visitor who has never picked a language sees. Blank follows the default you set in Admin → Languages. |
You keep control of the pool: switch a language off in Admin → Languages and it disappears from every storefront at once, whether or not a reseller had ticked it. A panel left with no language of its own falls back to offering all of yours, so a switcher is never empty.
9.11 Selling below your own price
A serious reseller does not want your retail price — they want to be able to undercut you and still earn. That is what the catalogue price adjustment does when you give it a negative number.
Say a service costs you 1.00 from your provider and you sell it at 2.00
to your own customers. Put -10 on a plan and every reseller on that tier buys at
1.80. They can resell at 1.90 — under you — and still make
0.10 on every order, while you make 0.80 on the same order without
touching it.
| You set | The reseller pays you | Who it is for |
|---|---|---|
+30 | 2.60 | A free tier that costs you hosting and supply and pays you back per order. |
0 | 2.00 | Your own price. You earn from their monthly plan fee instead. |
-10 | 1.80 | A paid tier, or a reseller who brings volume and needs room to compete. |
-100 | 1.00 | Everything you make on that service handed over. The floor. |
-40% can be comfortable on one service and below
cost on the next, so the panel decides per row rather than per percentage. Nothing you can type on
either screen makes you sell supply at a loss.Where to set it. Two places, and the more specific one wins:
- On a plan (Admin → Resellers → Plans) — your price list. Every reseller on the tier moves the day you re-price it.
- On one reseller (Admin → Resellers → Create or Edit, "Catalogue price for this reseller") — the deal you struck with them. It overrides their plan, so re-pricing the tier later does not silently break an agreement. Leave the box empty and they follow their plan, which is how every reseller behaves until you fill it in.
The reseller is never shown a "discount": the number they buy at simply is the price of the service on their screens and the amount their wallet is debited — one figure, from one calculation, so their price list and their invoices can never disagree. Their own margin, set in Margins & pricing, still stacks on top of it.
10. Reseller plans and subscriptions
Plans turn resellers into recurring revenue. A plan defines what a child panel can do and what it costs per period; the fee is taken automatically from the reseller's existing wallet, as a ledger entry, with no card checkout and no second payment gateway to configure.
plan_charge ledger entry. They keep it funded through Add funds exactly as
before. Nothing new to install, and one balance to watch instead of two.10.1 Creating plans
Admin → Resellers → Plans. Three plans are seeded so you have a working commercial structure on day one — Free, Pro and Business — and you can edit, rename or replace them entirely.
0 makes a free tier. The currency must be your base currency, because the charge is a wallet debit.monthly, quarterly, semiannual, annual or lifetime. A lifetime plan is charged once and never renews.0 means no trial.10.2 The feature matrix
A plan does not meter usage. There are no quotas on clients, services or orders per day — a reseller on the smallest tier can grow without hitting a wall, which is the point. What a plan decides is which modules their panel has, what they pay for the catalogue and how many domains they may bring.
Modules that are always included
Six modules can never be switched off, because a panel without them is not a panel: the dashboard, categories and services, orders, clients, the finance area (wallet, top-ups, ledger and plan billing) and settings with branding.
Optional modules
Twelve more are checkboxes on the plan form. All of them are on by default — you switch a module off to build a cheaper tier, never on. A plan created before a module existed still grants it.
| Module | What the reseller loses without it |
|---|---|
| Margins & pricing | The screen where they set their own markup over your catalogue. |
| CRM inbox & channels | The whole omnichannel inbox, contacts and labels. |
| CRM AI agents | Automatic AI replies on their channels. |
| CRM automations | Rule-based flows on their conversations. |
| Support tickets | Their clients can no longer open tickets. |
| Team seats | Sub-accounts with their own permissions. |
| Content & blog | News, FAQs, blog posts and static pages. |
| Landing page studio | Their own editable landing page. |
| Custom domain | The domains screen. It stays visible even on a subdomain-only tier, so they can see what a higher tier would add. |
| Client portal | The storefront their clients buy from. |
| Reseller API | The public API surface for their own clients. |
| Blacklist | Blocking links, domains and words on their panel. |
The commercial dials
| Setting | Meaning | Seeded values |
|---|---|---|
| Catalogue price adjustment % | What this tier pays for your catalogue, as a percentage of your own sale price.
0 means they buy at your price. A positive number is your cut
on every order they place. A negative number is a wholesale discount, so
the tier can sell under you and still earn — see §9.11. |
Free +30%, Pro 0%, Business 0% |
| Custom domains | How many domains of their own they may connect. 0 means the platform
subdomain only; -1 means unlimited. |
Free 0, Pro 1, Business 5 |
| Own providers | Whether they may connect their own upstream SMM provider and sell its catalogue alongside yours (§10.9). Off unless you turn it on. | Business only |
| Client and landing skins | Which storefront and landing designs the tier includes. A skin added in a future release is granted to existing plans rather than silently withheld. | All, by default |
| Payment gateways | Which gateways a reseller on this tier may connect to charge their own customers. The list is the gateways this installation has, add-ons included, so one you install later appears here by itself. Same rule as the skins: a gateway a stored plan never heard of is included until you untick it. | All, by default |
10.3 Managing resellers
The reseller list shows plan, subscription status, wallet balance and domain count for every child panel. Provisioning a new one is covered in §9.2; opening a row gives you the subscription controls below.
10.4 Subscription actions
Every action that moves money is permission-gated: comp and refund need their own permissions, which staff do not have unless you grant them.
| Action | Effect |
|---|---|
| Assign or change plan | Starts a new subscription; the previous one is retired to history. Optional price override and trial. |
| Comp | A free subscription: active, priced at zero, never charged. For partners and for making an apology stick. |
| Override price | Future periods bill your figure instead of the plan price. Recorded on the subscription. |
| Extend expiry | Pushes the period end and the next charge forward by N days at no cost — goodwill without touching the price. |
| Suspend / reactivate | Locks or unlocks the reseller area and blocks new orders on their storefront. |
| Cancel now / at period end | Immediate lock, or let them ride out the period they paid for and expire at the end of it. |
| Refund a charge | Credits a plan charge back to the reseller's wallet as a plan_refund. Idempotent: refunding twice does not pay twice. |
10.5 Billing lifecycle
A background pass charges each due subscription exactly once per period. The charge is idempotent and transactional: the period's charge row is unique, the subscription is locked for the attempt, and a period that is already paid short-circuits before any debit. A subscription moves through six states:
trialing  --(charge succeeds at trial end)--> active
active    --(renewal succeeds)-------------> active
          --(not enough balance)-----------> past_due --(top up, charge ok)--> active
past_due  --(grace elapsed)----------------> suspended --(pay, reactivate)---> active
suspended --(retention elapsed, §10.6)------> panel permanently deleted
cancelled / expired (end of life)10.6 Dunning and suspension
When a renewal fails for lack of balance the subscription becomes past due and a grace deadline is set from the plan's grace days. The reseller is e-mailed on the first and third failed attempt — enough to be noticed, not enough to be noise. If the grace window runs out the subscription is suspended and a final notice goes out. A trial that is about to convert triggers its own heads-up a few days before the first charge.
The retention window: suspended panels do not live forever
A panel suspended for non-payment is kept for a retention period — 30 days as shipped, counted from the day of the suspension — and then permanently deleted by the same billing pass: the panel, its customers, orders, domains and settings are removed for good. The reseller is warned by e-mail and in-app notification at 14, 7, 3 and 1 days before the deletion date (each warning sent once; both messages are editable under Settings → Email templates), and paying or being reactivated at any point cancels the countdown entirely. After a deletion the reseller's own login and wallet balance survive — their account lives on your main site — so they can top up and open a fresh panel whenever they are ready, and they receive a final notice saying exactly that.
- Change the window with
RF_PURGE_SUSPENDED_AFTER_DAYSin.env(days). Set it to0to disable the warnings and the deletion completely — suspended panels are then kept forever. - Only billing suspensions expire. A panel you suspended by hand from Resellers (or from the subscription's actions) is never warned and never deleted — releasing it stays your decision.
- Every automatic deletion leaves a line in the application log
(
storage/logs), so there is always a trail of what was removed and when.
10.7 Charge cadence
Billing rides on the same machinery as everything else in §13, so it works with or without a real cron:
- With cron (recommended on a VPS): the scheduler runs the billing command
app:charge-subscriptionshourly. Add the standard cron line (§13.2) and setAUTOMATION_MODE=scheduler. - Without cron (shared hosting): with
AUTOMATION_MODE=middlewarethe charge pass runs off ordinary web traffic, at most once everyAUTOMATION_SUBSCRIPTIONS_INTERVALseconds — one hour as shipped.
Hourly is enough. A period boundary crossed within the hour is charged on the next pass, and a balance only changes when the reseller tops up.
10.8 Reseller self-serve billing
Resellers open Finance → Plan & Billing in their own panel to see their current plan, the next charge and their balance. When something is owed they get the amount due, a Pay now button that collects the period immediately from their wallet, and a link to add funds. They can also upgrade or downgrade to any public plan themselves — the difference is taken from the wallet, with no checkout and no ticket to you.
Everyone starts free, and pays before moving up
A visitor who signs up through /reseller-signup always lands on your
free plan. Your paid tiers are shown on that page as what the panel can grow
into, but they cannot be picked there: the ladder is sign up free, add funds, move up.
- Moving up is paid up front from the panel's own balance. The plan changes the moment the first period is collected, and is refused — naming the exact amount still missing — when the balance does not cover it. The plan card says so before they click.
- Nothing is lost either way. Customers, prices, domains, design, orders and balances belong to the panel, not to the plan. A plan change only writes a new subscription.
- Moving down to a free plan is never blocked by an empty balance.
- Your own way of creating a reseller is unchanged: from Resellers you can still put someone straight on any plan, or on none at all.
10.9 Own SMM provider
On a plan with own providers enabled, the reseller gets Storefront → My Providers. There they register their own upstream provider — URL and API key, stored encrypted — test the connection, and import its catalogue into their own services, alongside the catalogue they resell from you.
- Imported services are private to that reseller. They never appear in your catalogue and never leak to another reseller.
- For a service the reseller owns, the sale price is theirs and the provider cost is theirs.
- An order for one of those services is a single wallet debit: their client pays them, and they settle with their own provider directly. There is no leg through your wallet, and no cut for you on that order.
10.10 Plan limits reference
| Setting | Enforced where |
|---|---|
| Optional module on/off | The reseller's sidebar and the routes behind it — a module that is off has no menu entry and no reachable page. |
| Catalogue markup % | Order creation on the reseller's storefront: it is added to the owner price to form the reseller's cost. |
| Custom domains | Reseller → Domains, when they try to add one. |
| Own providers | Reseller → My Providers: the screen only exists on a tier that allows it. |
| Client and landing skins | The template pickers, in the admin and in the reseller's own settings. |
| Payment gateways | Reseller → My Payment Methods: the driver picker, saving, and switching a gateway back on. |
| Subscription usable | The reseller area as a whole, and the storefront order block when they are suspended. |
11. Public API
RedFamosa exposes the standard SMM API, the same key + action contract your own providers speak. Any bot, reseller integration or shop plugin written for that format works against your panel without a single change — which is exactly why your customers will ask for it.
11.1 The endpoint
POST {APP_URL}/api/v2{APP_URL}/api/v1 is an alias of the same handler, so clients configured for either
version work. Requests may be sent as application/x-www-form-urlencoded, as JSON, or
even as a query string on a GET — the parameters are read the same way. Two are always
required:
keyactionResponses are JSON. Errors come back as {"error": "..."} with a human-readable
message.
11.2 Actions
| Action | Parameters | Returns |
|---|---|---|
services | — | An array of the active services this key may order, each with service,
name, type, category, rate,
min, max, dripfeed, refill and
cancel. rate is the price this caller pays. |
add |
service, link, quantity; plus
runs and interval for drip-feed, comments for custom
comments, and the equivalent extras for the other service types |
{"order": 12345} |
status | order |
{"charge","start_count","status","remains","currency"}. A drip-feed parent
answers with its status, its runs and the list of child order
IDs. |
status (multiple) | orders — comma-separated IDs |
An object keyed by order ID; an unknown ID returns {"error": "..."} in its
own slot instead of failing the whole call. |
balance | — | {"balance","currency"} |
refill | order, or orders for several | {"refill": id}, or one entry per order. |
refill_status | refill, or refills | The state of a refill request. |
cancel | orders — comma-separated IDs | One entry per order with its cancellation ID or an error. |
A complete example
curl -X POST https://panel.example.com/api/v2 \
  -d "key=YOUR_API_KEY" \
  -d "action=add" \
  -d "service=143" \
  -d "link=https://example.com/profile/one" \
  -d "quantity=1000"

{"order":12345}
11.3 Idempotency-Key
Network calls fail halfway. A client that retries an add without protection buys
the same order twice — and then asks you for a refund. Send a unique key with each order
attempt and the problem disappears:
POST /api/v2
Idempotency-Key: 550e8400-e29b-41d4-a716-446655440000

key=YOUR_API_KEY&action=add&service=143&link=https://example.com/p/1&quantity=1000
The first request creates the order and its answer is stored against the key. A later request
with the same key replays that stored answer instead of creating a second order, for as long as
RF_API_IDEMPOTENCY_TTL allows — 1,440 minutes, that is 24 hours, as shipped. If
a retry arrives while the first one is still being processed, it is told so rather than being let
through.
add only — the other actions are already safe to repeat.11.4 Rate limits
The API is limited per key: RF_API_RATE_LIMIT requests per minute, 120 as
shipped, and 0 removes the limit entirely
(§4.7). Over the limit the answer is HTTP 429
with a Retry-After header telling the client how many seconds to wait. Requests
carrying an invalid key are throttled separately and more tightly, which is what stops someone
guessing keys.
11.5 Outgoing webhooks
Instead of having integrations poll status in a loop, let the panel push. Configure
the endpoint in Admin → Webhooks: the URL to call and the signing secret it
will be signed with.
When an order changes state the panel POSTs JSON:
{
  "event":     "order.status_changed",
  "timestamp": "2026-01-31T10:24:05+00:00",
  "data": {
    "order":       12345,
    "status":      "Completed",
    "charge":      "4.5000",
    "start_count": 1200,
    "remains":     0,
    "currency":    "USD",
    "service":     143,
    "link":        "https://example.com/profile/one"
  }
}
Every delivery carries an X-Webhook-Signature header: an HMAC-SHA256 of the body
computed with your signing secret. Verify it before you trust a payload —
otherwise anyone who learns your endpoint can invent order updates.
RF_WEBHOOK_MAX_ATTEMPTS, five as shipped.RF_WEBHOOK_TIMEOUT seconds per attempt, ten as shipped. Answer 200 fast and do your work afterwards.11.6 Getting the API key
A client finds their key in their own area under API, where they can issue one and regenerate it. The key is displayed once, at the moment it is created: only a hash of it is stored afterwards, so nobody — including you — can read it back later. A client who loses their key regenerates it, which invalidates the old one.
Each key belongs to one user in one panel. A reseller's client calling the API gets the reseller's catalogue at the reseller's prices, never yours. The API as a whole can be switched off for the panel in Settings → Default setting.
12. CRM — omnichannel
One inbox that turns WhatsApp, Messenger, Instagram, Telegram, e-mail, a web-chat widget and your own support tickets into a single conversation stream — answered by AI when you want, driven by automations, and wired to turn a chat into a paying client of the panel.
12.1 Overview
The CRM is built into the product. There is nothing extra to install: once the panel is
installed it appears as the CRM group in the sidebar of the owner admin
(/admin/crm) and of every reseller panel (/panel/crm).
- A three-pane unified inbox
- Seven channels, including internal tickets
- AI agents with a knowledge base
- A visual automation builder
- The chat-to-client conversion funnel
- An embeddable web-chat widget
- Contacts, labels and quick replies
- Reports, and full isolation per panel
In one paragraph: an operator — you, or one of your resellers — receives messages from every channel in one place. An AI agent can answer automatically using a knowledge base you paste in, and hand over to a human when it is out of its depth. An automation can run a whole flow: greet a prospect, create a client account on the panel, send the credentials over the same chat, force a password change on first sign-in and hand the conversation to a sales agent. That is the full path from a social-media message to a client who tops up and orders.
Roles at a glance
| Role | What they do in the CRM |
|---|---|
| Owner / super admin | Everything. Configures the Meta and Instagram apps, the AI keys and every setting, and sees the internal Support channel. |
| Staff | Works the inbox and manages agents, automations, contacts, labels and reports — but cannot touch channel credentials or CRM settings. |
| Reseller admin | The same CRM, scoped to their own panel: their own channels, their own AI keys, their own inbox. They never see yours. |
| Client | Does not see the operator inbox at all. They chat through the web widget and open support tickets, which reach you as conversations. |
12.2 Permissions and roles
The CRM adds eleven permissions to the panel's role system. They gate both the menu entries and the actions inside each screen.
| Permission | Grants |
|---|---|
crm.view | Baseline access to the CRM area. |
crm.inbox | Open the inbox and read conversations. |
crm.send | Reply, write internal notes, assign and resolve. |
crm.channels.manage | See the Channels screen and the token-health state. |
crm.channels.credentials | Write channel credentials: create, edit or delete a channel, connect through OAuth, sync WhatsApp templates, register the Telegram webhook. |
crm.ai.manage | Create AI agents and manage the knowledge base. |
crm.automations.manage | Build and switch on automations. |
crm.contacts.manage | Manage the contact directory and quick replies. |
crm.labels.manage | Manage labels and quick replies. |
crm.reports.view | View the CRM reports. |
crm.settings.manage | Open CRM Settings: the Meta and Instagram apps, verify token, AI keys, widget and operational toggles. |
Who gets what out of the box
| Role | crm.channels.credentials | crm.settings.manage | The other nine |
|---|---|---|---|
| Super admin | yes | yes | yes |
| Staff | no | no | yes |
| Reseller admin | yes | yes | yes |
| Client | no | no | no |
crm.channels.credentials to their role explicitly.To build a chat-only agent role, create a role with just crm.view,
crm.inbox and crm.send. Whether that agent sees every conversation in
the panel or only their own is the agent visibility setting
(§12.4).
12.3 The unified inbox
Open it at /admin/crm, or /panel/crm in a reseller panel. Three panes
side by side:
| Pane | Contents |
|---|---|
| Left — conversations | The filtered list, most recent first, paginated (twenty-five per page as shipped). Each row shows the contact, the channel, a preview of the last message, how long ago it arrived and an unread badge. |
| Middle — thread | The full history, the channel banner (for example the state of the WhatsApp 24-hour window) and the reply box. |
| Right — context | The contact card, the linked client account if there is one, labels, the assigned AI agent and human, and quick actions. |
Tabs, filters and search
The list refreshes by polling, and the open thread refreshes faster, so new messages appear without touching anything. There are no websockets — deliberately, because that is what makes the inbox work on plain shared hosting.
Working a conversation
- Reply — type and send; the message leaves through that channel's provider and is stored on the thread.
- Internal note — saved on the thread, never sent to the customer, and excluded from the AI context and from reports. For hand-off comments.
- Assign — to yourself or a colleague, which notifies them.
- Resolve — moves it to resolved. A new message reopens it automatically.
- Labels — tag the conversation, for example hot lead or sale.
- AI toggle — pause or resume the bot on this conversation. Replying as a human pauses it for you.
12.4 CRM Settings — the one-time setup
Channels live at CRM → Channels, but before any Meta channel can be connected you must fill in your app details at CRM → CRM Settings. Secrets there are write-only — leaving a secret field blank keeps the stored value — and are encrypted at rest.
Meta app (WhatsApp, Messenger, Instagram messaging)
v21.0 as shipped. Change it only when Meta asks you to.Instagram app
Instagram messaging uses a separate child app with its own credentials — that is Meta's design, not ours. Enter its App ID and App secret here to enable the Connect Instagram button.
The two values you copy into Meta
{APP_URL}/crm/webhooks/meta/{panelUid} — paste it into your Meta app as the callback URL. The identifier at the end belongs to this panel only.{APP_URL}/crm/oauth/callback — add it to the valid OAuth redirect URIs. One redirect serves you and every reseller.Paste your verify token alongside the webhook URL in the same Meta screen.
The rest of the screen
12.5 WhatsApp (Cloud API)
The easy way. Once the App ID, App secret and Embedded Signup configuration ID are saved, a Connect WhatsApp button appears on the Channels screen.
- Click Connect WhatsApp. A Meta window opens.
- Sign in and choose — or create — the WhatsApp Business Account and the phone number to authorise.
- The window returns a code, which the panel exchanges server-side; your App secret never reaches the browser. The WhatsApp account is subscribed to your webhook and the channel is filled in automatically: phone number ID, business account ID and display number.
Manual alternative. If you already have the values from Meta's API setup screen, use Add channel → WhatsApp and fill in the phone number ID (the routing identifier), a permanent access token, the App secret, the WhatsApp Business Account ID and the display number.
12.6 Messenger
- On Channels, click Connect Messenger. Facebook's consent dialog opens, asking for the page-messaging permissions.
- Authorise your page. The panel exchanges the code server-side, subscribes the page to your webhook and creates the channel.
Manual alternative: Add channel → Messenger with the page ID (the routing identifier), a page access token and the App secret.
12.7 Instagram
Enter the separate Instagram app credentials in CRM Settings first, then:
- Click Connect Instagram on the Channels screen.
- Authorise the Instagram business account — Instagram messaging requires a business or creator account linked to a Facebook page.
- The panel completes the token exchange, creates the channel and subscribes it. The long-lived token is stored and refreshed automatically before it expires.
Manual alternative: Add channel → Instagram with the Instagram account ID (the routing identifier), an access token and the App secret.
12.8 Telegram
Telegram needs no Meta app, just a bot.
- In Telegram, ask BotFather for a new bot and copy the bot token and the bot's username.
- On Channels, Add channel → Telegram, paste both and save.
- Open the channel menu and click Register webhook. This tells Telegram to
deliver updates to
{APP_URL}/crm/webhooks/telegram/{channelUid}, with a secret token derived from your bot token so that only Telegram can post to it.
Messages to your bot now land in the inbox, and reply keyboards produced by button steps are rendered natively.
12.9 Email (IMAP and SMTP)
E-mail is pulled over IMAP — there is no webhook — and sent over SMTP. Use Add channel → Email:
A background task polls the mailbox on an interval — every sixty seconds as shipped — so this channel depends on your automation mode actually running (§13). Replies are threaded by message ID, quoted text is trimmed, and automatic replies are filtered out instead of starting conversations with a robot.
12.10 Web Chat and Support
Add channel → Web Chat creates the widget channel:
Saving gives you the script tag to paste into any site — see §12.13 for embedding, branding and security.
The Support channel, by contrast, is created for you: one per panel, not shown in the channel list and not editable. It exists only to bring your internal tickets into the inbox.
12.11 AI agents
Manage them at CRM → AI Agents. An agent is a reusable configuration that answers conversations automatically while the bot is active on them.
- New agent, and give it a name such as "Sales" or "FAQ bot".
- Pick a provider and a model.
- Optionally paste an API key for this agent; leave it blank to use the panel-level key. Test key validates it against the live provider before you save.
- Write the system prompt — the persona, the rules, the goal. This is where the quality of the whole thing is decided.
- Set the temperature and the maximum tokens per reply.
- Decide whether fallback to human is on, and save.
| Provider | Selectable models |
|---|---|
| OpenAI | gpt-4o-mini, gpt-4o, gpt-4.1-mini, gpt-4.1 |
| Anthropic | claude-3-5-haiku-latest, claude-3-5-sonnet-latest, claude-sonnet-4-latest |
| Gemini | gemini-1.5-flash, gemini-1.5-pro, gemini-2.0-flash |
Knowledge base
While editing an agent, add knowledge sources: a title and the text — your FAQs, prices, policies, service descriptions. The panel splits it into chunks and indexes them; when the agent answers, the most relevant chunks are retrieved and injected into the prompt, so replies come from your content instead of from the model's imagination. How many chunks are used is the top K value in CRM Settings, five by default.
Handing over to a human
With fallback to human on, the agent is told it may emit a
[TRANSFER] marker when it cannot help. When it does, the panel strips the marker from
the text, pauses the bot on that conversation and assigns it to the least loaded member of the
team. With the setting off, the agent never hands over by itself — a pure round-the-clock
FAQ bot — though a human can always take over simply by replying.
Switching AI on
- Make default — one agent per panel can be the default; new conversations start with the bot active using it.
- Per conversation — the context pane has an AI toggle and an agent selector, and automations can switch agents mid-flow.
- On support tickets — off until you enable AI on support.
12.12 Automations
Build flows at CRM → Automations. An automation is a trigger plus a flow of steps that you assemble from a palette.
Triggers
| Trigger | Fires when |
|---|---|
| First message | A brand-new conversation starts. A channel-specific flow wins over an all-channels one. |
| Keyword | An incoming message contains the text you specify, matched without case sensitivity. |
| Every message | Any inbound message at all. |
| Conversation assigned | A conversation is assigned to a team member. |
| Label added | A label is attached to a conversation. |
| Conversation resolved | A conversation is marked resolved — useful for a satisfaction follow-up. |
The step palette
| Group | Steps |
|---|---|
| Messaging | Send message (interpolated text) · Send media (image, audio, video or document by URL, with a caption) · Send gallery · Send buttons (rendered natively where the channel supports it) · Ask question (waits for the reply and stores the answer for later steps) |
| Flow | Condition · Branch (wait for a keyword reply and take the matching path) · Wait · Drip follow-up (a deferred message, optionally only if the contact has not replied) |
| Actions | Add label · Remove label · Set status · Assign AI agent · Assign staff · Pause bot · Resume bot · Create client account · Call webhook (an outbound POST or GET with an interpolated body, protected against internal-address abuse and capped at ten seconds) |
Placeholders
Text steps interpolate values from the conversation. The editor offers the common ones as clickable chips:
{{contact.name|there}}     the contact's name, or "there" when unknown
{{contact.email}}         {{contact.phone}}
{{company.name}}          the panel's name
{{agent.name}}            the assigned team member
{{answers.email}}         an answer captured by an "ask question" step
The engine also resolves {{channel.name}}, {{channel.type}},
{{company.email}} and {{message.content}}, and any
{{answers.<key>}} you defined in an ask question step. The
| syntax supplies the fallback when a value is empty.
Templates
Fourteen ready-made flows ship with the product, so you rarely start from an empty canvas: order funnels and catalogue welcomes for WhatsApp, an Instagram DM welcome, new-customer onboarding, the capture-and-convert funnel, a keyword pricing responder, social-proof conversion and nurture flows, a win-back sequence, web-chat lead capture, an FAQ triage, a Telegram start menu, a Messenger FAQ with hand-off, and a plain welcome. Load one and edit it — it is faster than designing a flow from scratch, and it shows you what the steps do.
The flagship flow: capture and convert
Start a new automation from the Capture & convert template. It builds a first-message flow that welcomes the prospect, creates a client account on your panel, sends a short tour and hands the conversation to a sales agent.
What the create client account step really does:
- Resolves the contact's name, e-mail and phone — captured by an earlier step or by the AI. Without a valid e-mail it takes the failure path.
- Looks for an existing client in this panel with that e-mail. If there is one it links to it; if not it creates a client account with a strong random temporary password, in the same panel as the conversation.
- Links the contact to that user and records the provisioning for auditing.
- Sends the credentials over the same chat — e-mail, temporary password and the panel's sign-in address. On WhatsApp outside the 24-hour window that goes out as an approved template.
- Assigns the sales agent so the bot keeps working towards the first top-up.
Save the automation, then switch it on from the list. The runs counter shows how many times it has executed, and flows are validated server-side on save.
12.13 The web chat widget
The web-chat channel gives you a widget for any external site.
<script src="https://panel.example.com/crm/widget/CHANNEL_UID.js" async></script>Paste it before </body>. The script injects a floating launcher with your
title, greeting, colour and position. It has no dependencies, keeps its session in the visitor's
browser storage and polls for new messages.
Title, greeting, colour and position come from the channel; the small branding line under the widget comes from CRM Settings — blank hides it, which is what a reseller wants for a white-label site.
Putting it on your own landing page
You do not need to edit a template. Open Settings → Analytics, paste the same
snippet into the free-form field, and save. It is rendered in the <head> of your
landing page and of every public page, so the launcher appears on your own site exactly as it does
on an external one.
Copy the snippet from the channel's own card on the Channels screen: it is generated with your panel address. A snippet copied from another installation — a demo, or a second panel of your own — points at that installation, so the visitor's messages arrive in its inbox and never reach yours.
Security: allowed origins
The widget endpoints enforce a fail-closed list of allowed origins per panel. In CRM Settings → widget allowed origins, list the sites permitted to embed it, one per line:
shop.example.com.example.com — any sub-domain of it* — not recommended in productionThe panel's own domain is always allowed. An origin that is not on the list gets no CORS header
at all, so the embed simply does not work — which is the point. The widget's session is an
opaque server-side token rather than a guessable ID — it travels in an
X-RF-Widget-Session header — and the endpoints are rate-limited.
Signed identity for signed-in visitors
If you embed the widget on a page where the visitor is already signed in to your panel, you can hand the widget a signed identity so their chats attach to their account and survive across sessions. Set a global before the script loads:
<script>
  window.RF_WIDGET_IDENTITY = {
    user_id: 4821,
    name:    "Alex Doe",
    email:   "alex@example.com",
    expires: 1750000000,          // unix timestamp
    sig:     "hmac-sha256-hex"    // see below
  };
</script>
<script src="https://panel.example.com/crm/widget/CHANNEL_UID.js" async></script>
Your server computes the signature as:
sig = HMAC-SHA256( "{channel_uid}|{user_id}|{expires}", APP_KEY )The panel re-verifies the signature and the expiry on every call and confirms the user belongs to the channel's panel. An invalid or expired signature is treated as an anonymous visitor rather than an error, so a stale page never breaks the chat.
12.14 Webhooks per panel
Each panel has its own inbound endpoints. The Meta channels share one address per panel; Telegram has one per channel:
Meta (WhatsApp + Messenger + Instagram)
  {APP_URL}/crm/webhooks/meta/{panelUid}         GET and POST

Telegram
{APP_URL}/crm/webhooks/telegram/{channelUid} POST- The panel is identified by the identifier in the path, never by the host name. That is what routes a reseller's messages to the reseller, and it is why the address is always on your main host even when the reseller has their own domain — message delivery does not depend on their certificate.
- The GET request is Meta's verification challenge, validated against that panel's verify token. Each reseller pastes their own token into their own Meta app.
- The POST carries the messages. Its signature is verified fail-closed against the channel's App secret; an unsigned or wrongly signed request is rejected outright.
Both values to copy are shown on each panel's own CRM Settings screen. E-mail uses no webhook, and the widget resolves its panel from the channel identifier in the script URL.
How the work behind an inbound message is executed — parsing, media download, AI reply,
automations — depends on AUTOMATION_MODE, exactly as for the rest of the panel:
the webhook answers immediately and hands the work to the background. See
§13.
12.15 Security notes
- Encrypted credentials. Channel credentials, AI keys and secret settings are encrypted at rest and never rendered back into a form. Blank means "keep what is stored".
- Fail-closed signatures. Every inbound Meta or Telegram webhook must carry a valid signature. There is no "accept it if no secret is configured" fallback.
- Server-side OAuth. The one-click connect flows use the official JavaScript SDK to open the authorisation window, but the code is always exchanged server-side — the App secret never reaches the browser — and the result is posted back to your own origin only, never to any listener.
- Panel isolation in background jobs. Every queued job pins its panel before touching data, so a job for one panel can never read or write another's. Client lookups in the conversion funnel are always filtered by panel, which is what prevents a cross-panel account takeover.
- Outbound webhook guard. The call webhook step validates its target against internal and metadata addresses, does not follow redirects and times out at ten seconds.
- Avatar proxy. Contact avatars are fetched server-side through a proxy that only allows the providers' own image hosts, checks that the bytes really are an image, does not follow redirects and caches locally.
- Media uploads. Limited to allowed image types, verified against the real file contents rather than the extension, and size-capped.
- Temporary passwords. Accounts provisioned from a chat get a strong random password and a forced change on first sign-in.
13. Cron and automation
A panel is not a website that waits to be clicked. Orders have to be sent upstream, their
status polled, drip-feed runs released, catalogues synced, mailboxes read, channel tokens
refreshed and reseller subscriptions charged. All of that is background work, and
AUTOMATION_MODE decides how it runs.
13.1 The three modes
| Mode | How the work runs | Right for |
|---|---|---|
middleware |
Each incoming web request also drains a little background work, with a lock so two visitors never run the same pass twice and a hard limit on how much one request may do. Queued CRM work — incoming chats, mailbox fetches, AI replies — is processed the same way, and since a chat webhook is itself a web request, messages land in the inbox within seconds. No cron, no worker, nothing to configure. | Shared hosting, and any panel with steady traffic. This is what the installer sets. |
scheduler |
One cron entry, once a minute, drives everything — including a bounded pass over the queued CRM work. Work happens on time whether or not anyone is visiting. | Any host where you can add a cron job. The best value for the least effort. |
queue |
The same once-a-minute cron enqueues the work, and a persistent worker executes it immediately as jobs arrive. Highest throughput and the most responsive. | A VPS with a process supervisor, and panels with real volume. |
middleware mode
It only moves when someone visits your site. A panel with no traffic overnight dispatches nothing
overnight, and a drip-feed run scheduled for 4 a.m. is released when the first visitor
arrives in the morning. It is a perfectly good way to start, and the right answer on hosting
without cron — but the day you sell drip-feed or promise fast delivery, move to
scheduler.You can switch mode without editing files, in Admin → Cron Jobs. That screen also lists each scheduled task with the time it last ran and a Run now button — the fastest way to prove that your background processing actually works.
13.2 Setting up cron on cPanel
In cPanel → Cron Jobs, add a single entry running every minute:
* * * * * /usr/local/bin/php /home/USERNAME/redfamosa/artisan schedule:run >> /dev/null 2>&1Two things to get right:
- The path to
artisanis the project root, the folder that containsapp/andpublic/. If your domain serves/home/USERNAME/redfamosa/public, then artisan is at/home/USERNAME/redfamosa/artisan; if you installed everything insidepublic_html(§3.1, Path B), it is at/home/USERNAME/public_html/artisan. - The PHP binary must be version 8.2 or newer. If the job does not fire, find the right binary in cPanel Terminal with which php, or check the path shown in MultiPHP Manager, and use the absolute path.
Then set AUTOMATION_MODE=scheduler. That one cron line drives two scheduled
tasks: the automation tick every minute, and reseller plan billing
every hour.
13.3 Running a queue worker
On a VPS, set AUTOMATION_MODE=queue, keep the once-a-minute cron entry from
§13.2, and run a persistent worker:
php artisan queue:work --sleep=3 --tries=3 --timeout=60 --max-time=3600Use Supervisor or a systemd unit to keep the worker alive and restart it if it
stops. --max-time=3600 makes it exit once an hour so the supervisor restarts it with
fresh code and fresh memory — also the reason you must restart the worker after an
update.
13.4 What runs in the background
- Dispatch orders — orders waiting in Awaiting are sent to their provider.
- Poll order status — live orders are queried, in batches, to detect completion, partial delivery or cancellation. Fresh orders are checked often, old ones progressively less.
- Drip-feed runs — each due instalment is released as a child order.
- Refills and cancellations — requests are forwarded and their outcome followed.
- Provider catalogue sync and metadata scraping — on their own slower intervals.
- Average delivery times — recalculated from real orders.
- Provider balances — refreshed for the providers list.
- Reseller plan billing — charges, dunning e-mails, suspensions and trial reminders (§10.7).
- CRM work — inbound message processing, mailbox polling, channel token health and refresh, knowledge-base indexing and deferred automation steps.
How CRM messages are processed in each mode
Every CRM channel delivers through the job queue: a Messenger, Instagram, WhatsApp, Telegram or web-chat message arrives as a webhook, is verified, and is queued for processing; the same goes for mailbox fetches, AI replies and media downloads. Who runs that queue depends on the mode:
middleware— nothing to do. Every web request also runs a bounded batch of queued jobs (AUTOMATION_DRAIN_SECONDS/AUTOMATION_DRAIN_JOBSin.env, default 15 s / 30 jobs), and the webhook call that delivers a chat message is itself such a request — so conversations appear in the inbox within seconds even with no other traffic.scheduler— nothing extra to do. The once-a-minuteschedule:runtick processes the same bounded batch after its own tasks, plus the drain that rides every web request.queue— yourqueue:workworker (§13.3) executes jobs the moment they arrive; this is the most responsive setup. If the worker ever stops, messages queue up instead of being lost — restart the worker, or press Run now on Process queued messages in Admin → Cron Jobs to empty the backlog by hand.
queue mode, also make sure your worker
process is actually running.14. Troubleshooting and FAQ
14.1 Installation
"Please provide a valid cache path"
The application cannot write its compiled views. The storage/framework folder is
missing its sub-folders, or they are not writable. Make sure these exist and are writable by the
user that runs PHP:
storage/framework/cache/data
storage/framework/sessions
storage/framework/views
storage/logs
bootstrap/cache
Some FTP clients and unzip tools silently drop empty directories, which is how the folders go missing in the first place. Create them by hand in File Manager, set them to 755, and reload.
"No application encryption key has been specified"
There is no .env file. RedFamosa creates it on the first request by copying
.env.example and then generating the key — so this message means the copy could
not happen. Check that .env.example is present in the project root (some extraction
tools skip files whose names start with a dot) and that the project root is writable so the new
file can be created. Copying .env.example to .env yourself and reloading
the page fixes it immediately.
The wizard's buttons and links point at https:// but the site is on http://
Everything the panel generates — links, form actions, redirects — uses the scheme
written in APP_URL. If that value starts with https while the site is
still served over plain http, every link points at an address your server does not
answer, and the panel looks broken even though nothing is wrong with it.
Fix it in one of two ways: install the certificate and really serve the site over HTTPS
(recommended), or edit APP_URL in .env to start with
http://. Then reload. If you already finished the installation, also make sure
SESSION_SECURE_COOKIE matches: true on HTTPS, false on
plain HTTP — a secure cookie on an insecure site means nobody can stay signed in.
A requirements check will not turn green
See the table in §3.3. The most common case on shared hosting is that the domain is running an older PHP version than the account's default: change it in MultiPHP Manager for that specific domain, not globally.
A 500 error, or a blank page, right after uploading
- Check the layout: either the document root points at
public/, or the whole product (including its root.htaccess) sits directly inpublic_html— see §3.1. A half-way mix of the two layouts is the most common cause. - Check that
public/.htaccessand the root.htaccesssurvived the upload and that Apache allows them (AllowOverride All). - Check that
storage/andbootstrap/cache/are writable. - Read
storage/logs/laravel.log— the real error is at the end of it.
The panel loads, but nothing responds — buttons, menus and pop-ups do nothing
Every screen is painted correctly and then nothing works: menus will not open, dialogs never appear, no form saves, and no error message is shown anywhere. Open your browser's developer console (F12, tab Console) and you will find these two lines:
GET https://your-panel.com/livewire/livewire.min.js?id=… 404 (Not Found)
Uncaught ReferenceError: Alpine is not definedThat file is the panel's JavaScript engine, so a 404 on it leaves every screen looking right
and completely dead. It is not a file missing from your upload:
/livewire/livewire.min.js is an address answered by PHP, not a file on disk —
which is why there is no livewire folder inside public/, and why
creating one does not help.
What causes it is a rule in your web server that catches every address ending in
.js and serves it from disk instead of passing it to PHP. Nginx templates shipped by
server control panels — aaPanel among them — contain one by default. If your site's
configuration has a block like this, that is the one:
location ~ .*\.(js|css)?$ { expires 12h; }The fix, on Nginx. Add the block below to your site's configuration, placed
above both location / and the .js rule. Do not delete or edit
the .js rule itself — the rest of your static files should keep being served and
cached exactly as they are:
location ^~ /livewire/ {
    try_files $uri $uri/ /index.php?$query_string;
}
The ^~ is the part that matters: it is the only prefix Nginx allows to win over a
regular-expression rule such as the .js one. Save, reload Nginx, and then clear the
compiled configuration:
php artisan optimize:clearHow to check it without guessing. Copy the address from the console —
including the ?id=… at the end — and open it in a browser tab on its own. A page
full of JavaScript means it is fixed; a 404 page means the change has not taken effect yet. Test it
with that ?id=…: what follows the question mark is part of the cached address,
so the same path without it can answer perfectly while the panel keeps failing. Back in the panel,
press Ctrl+F5 and confirm the console has no red lines left.
On Apache and LiteSpeed you should not need any of this — the
.htaccess files included in the download already route these addresses correctly. If
your host lets you switch the site's web server, that is also a valid one-click way out.
If you cannot edit the Nginx configuration at all, you can turn that address into a real file, which any configuration serves:
php artisan livewire:publish --assetsThat writes the JavaScript into public/vendor/livewire/ and the panel loads it from
there instead. One thing to remember: the published copy is a snapshot, so run the command again
after every RedFamosa update — your browser console warns you when it has fallen behind.
A screen shows a “403 Forbidden” page inside a box, with the panel still visible around it
One screen — often Settings — stops saving, and instead of a message from the panel you get a framed box containing a 403 Forbidden page from your web server (LiteSpeed, Nginx or Apache), while the rest of the panel is painted normally behind it.
That box is not a RedFamosa screen. When a request comes back with a reply the panel cannot understand, it shows you the server's raw answer rather than hiding it. So what you are reading is your own server refusing the request before PHP ever ran — the panel never received it and has nothing to report.
The cause is almost always ModSecurity (or a similar web application firewall),
which most control panels — cPanel, aaPanel, Imunify360, Plesk — enable by default. It
inspects what is being submitted, and a value that merely looks like an attempt to reach a
system file is enough. Text such as ../, .htaccess, .env or
/etc/ inside a field is the usual trigger — a canonical URL, an image path or a
meta description are the fields where that happens by accident. Because the value is submitted again
on every action of that screen, the screen keeps failing until the value is removed or the rule is
adjusted.
Confirm it in one minute. Open your browser's developer tools
(F12), tab Network, and repeat the action. A request to
/livewire/update with status 403 is your firewall; if instead the
request succeeds and the panel shows its own red message, the problem is in the panel and the
message tells you what it is.
Getting it fixed. Two things, in this order:
- Reload the screen first. If it works again, the value was never saved — whatever
you had just typed is the trigger. Re-enter it without the path-like part (a full address such as
https://your-panel.com/logo.pngrather than../uploads/logo.png). - If it keeps failing, the value is stored and your host has to allow it. In your control
panel open ModSecurity's log — cPanel: Security → ModSecurity Tools → Hits
List; aaPanel: the firewall's log tab — and look at the most recent entry. It names the
rule id and the exact text that matched. Give your host that rule id and ask them to
disable it for your domain, or only for the address
/livewire/update. That is a one-line change on their side, and nothing else about your site's protection changes.
../ in a support ticket, or a service description that mentions a
file path. Turning the rule off for one address keeps the protection everywhere else, which is why
it is the fix we recommend rather than restricting what you are allowed to type.The installer opens again on a panel that is already installed
storage/app/installed.lock is missing — almost always because
storage/ was overwritten during an update. Do not run the wizard
again: it would try to migrate an existing database. Restore the file from your backup, or create
it with any content, and the panel comes straight back.
14.2 Orders and providers
A very large provider catalogue is slow, or runs out of memory
A provider catalogue is downloaded whole, so the memory your server allows PHP is what sets the practical ceiling. These are measured figures, on a catalogue whose services carry long descriptions — a catalogue without descriptions is roughly a third of the size:
| Services at the provider | memory_limit you need |
|---|---|
| up to ~6,000 | 128M (the common shared-hosting default) is enough |
| ~12,000 | 256M |
| more than that | 512M, and expect the first load to take a few seconds |
If the Manage catalogue screen shows a server error or a blank page on a big
catalogue, raise memory_limit in your hosting control panel and reload. The symptom is
the page failing rather than loading slowly, and it appears on every action of that screen
— searching and filtering too, not just the import buttons.
Two settings on the database side are worth checking on a large catalogue as well, because the
panel keeps the fetched catalogue in its cache: max_allowed_packet (4 MB on a lot
of shared hosting — 64 MB is a comfortable value) and, if your .env has
CACHE_STORE=database, the size of the cache table rows. From version
1.9.0 the panel stores the catalogue in small pieces and simply skips the cache when the store
refuses it, so neither one can break the screen any more — at worst the catalogue is
re-fetched from your provider more often, which is slower but works.
Orders sit in "Awaiting" and never leave
Nothing is dispatching them. Open Admin → Cron Jobs and look at the last
run of the automation tick. In middleware mode, remember the work only happens when
someone visits the site — open the storefront in another tab and watch the timestamp move.
If it does not move at all, see §13.
Orders end up in "Error"
The provider rejected them, and its own message is stored on the order — open one and read it. The usual causes, in order of likelihood: your balance at the provider is exhausted; the provider changed or removed that service ID; the link does not match what the service expects; the quantity is outside the provider's own limits. Fix the cause, then retry the order or cancel it to refund the client (§7.5).
What does "Simulated" mean?
It is a manual marker meaning "this order never really went upstream". Nothing sets it automatically. It exists so an operator can record the truth about an order instead of quietly marking it complete — and note that setting it does not refund anything: to return the money you cancel the order.
Can I connect more than one provider?
Yes, as many as you like. Any provider speaking the standard SMM API works. Different services can come from different providers, which is also how you build redundancy: keep a second provider configured for your best-selling services and repoint the service if the first one degrades.
A drip-feed order is releasing its runs late
Expected in middleware mode, where runs are released by visitor traffic. Move to
scheduler mode (§13.2).
14.3 Billing and resellers
A client's balance is wrong
Balances are the sum of ledger entries, so there is no field to correct. Open the user in Admin → Users and adjust the balance with a positive or negative amount and a reason: that writes a new ledger entry and the displayed balance updates at once, with the history intact.
A card payment succeeded but the wallet did not move
The gateway's notification is not reaching you. Check that the webhook endpoint is registered
in the gateway dashboard with the right address
({APP_URL}/api/webhooks/stripe or {APP_URL}/api/webhooks/paypal), that
the signing secret in the payment method matches the one the gateway shows, and that
APP_URL is the address the gateway can actually reach.
A reseller's subdomain does not resolve
Three things must all be true: RF_PANEL_BASE_HOST is set in .env, a
wildcard DNS record for that host points at your server, and your web server answers for the
wildcard with the same document root as the main panel. See
§4.5.
A reseller cannot add their own domain
Either their plan does not allow custom domains — check the plan's domain count
(§10.2) — or you have not filled in
RF_PANEL_IP or RF_PANEL_CNAME_TARGET, in which case they are being asked
to point their DNS at nothing.
A reseller says their clients cannot order
Look at two columns in the reseller list: their wallet balance and their subscription status. An empty wallet fails the debit for every order their clients place, and a suspended subscription blocks new orders on their storefront on purpose (§10.6).
14.4 CRM and channels
The "Connect WhatsApp / Messenger / Instagram" button is not there
Those one-click buttons only appear once the panel's app credentials are saved. For WhatsApp and Messenger you need the Meta App ID and App secret — plus the Embedded Signup configuration ID for the WhatsApp one-click flow; Instagram needs its own separate App ID and secret. You can always create the channel manually instead (§12.5–§12.7).
WhatsApp messages will not send
You are almost certainly outside the 24-hour window: free-form messages are only allowed within 24 hours of the customer's last message, and after that you must send an approved template. Run Sync templates on the channel and send one. If that is not it, test the channel's access token from its menu.
The AI does not reply
Check in this order: is there a default agent, or an agent assigned to that conversation; is the bot active and not paused (a human reply pauses it); is there a valid API key on the agent or on the panel; for a support ticket, is AI on support switched on. And remember the agent answers text — a bare image does not trigger a reply.
Telegram messages never arrive
Open the channel's menu and click Register webhook. Until you do, Telegram does not know where to deliver anything.
E-mails never arrive in the inbox
E-mail is pulled on a schedule, so your automation mode has to be running (§13). Then check the IMAP host and port, and make sure you used an app password if the mailbox has two-factor authentication.
The web widget does not connect
Add the site's domain to the widget's allowed origins in CRM Settings (§12.13). Requests from a domain that is not on the list are refused. Also confirm the channel is active and that the script URL carries the right channel identifier.
Messages are landing in the wrong panel
Each panel must copy its own webhook URL and verify token, from its own CRM Settings, into its own Meta app. The panel is chosen by the identifier in the webhook path, so a reseller who reuses your URL receives your routing.
A staff member cannot connect a channel or open CRM Settings
That is intended: staff do not hold crm.channels.credentials or
crm.settings.manage. Grant those to their role if you want them to, or do the
connection yourself (§12.2).
An Instagram channel shows "reconnect"
Instagram's long-lived tokens expire after about sixty days. The panel refreshes them automatically, but a token that was revoked cannot be refreshed — run Connect Instagram again.
Where do clients created from a chat end up?
They become ordinary client accounts on the same panel as the conversation, with a wallet created on their first credit or order. They sign in at that panel's client area, are forced to change their password once, and behave like any other client from then on (§12.12).
14.5 Maintenance
I changed APP_URL and the old address is still used
Clear the compiled configuration: php artisan optimize:clear. Without SSH, deleting
the files inside bootstrap/cache/ has the same effect — they are regenerated on
the next request.
How do I change the panel's language, or add one?
Admin → Languages is where the list lives and where the default is set; individual users choose their own in their profile. English and Spanish ship enabled, with several more locales listed and switched off — including a complete Arabic translation. Languages marked as RTL (Arabic ships that way) mirror the whole interface automatically — landing page, client portal, admin and reseller panels.
How do I stop new registrations?
Settings → Default setting, and turn client sign-up off. The register link disappears and the route stops accepting registrations; you can still create clients yourself from the admin.
Where are the logs?
storage/logs/. The application log rotates daily and keeps a fortnight by default.
If you are chasing a problem, set LOG_LEVEL=debug in .env, reproduce it,
then put the value back to error — debug logging on a busy panel fills a disk
faster than you would expect.
How do I update to a new version?
See §3.10. In short: back up, upload over the top without
touching .env or storage/, run the migrations, clear the caches, and
restart the queue worker if you use one.
15. Support and changelog
15.1 Getting support
If the manual has not answered your question:
- Open a support request from the item page where you bought RedFamosa. That is the official channel, and it keeps the whole history of your case in one place.
- Read the changelog on that same page first — what you are hitting may already be fixed in a newer release.
storage/logs/laravel.log. A stack trace usually identifies the problem instantly.
Never paste your .env, your APP_KEY or any live API key into a support
message.15.2 What is included
| Module | What it is | Documented in |
|---|---|---|
| SMM panel | Providers, catalogue, orders, wallet and billing — the core business. | §5–§8 |
| Reseller panels | Child panels on their own domains, with their own clients and prices. | §9 |
| Plans & subscriptions | Recurring revenue from resellers, billed from their wallet. | §10 |
| Public API | The standard SMM API for your clients' own tools. | §11 |
| CRM — omnichannel | Unified inbox for seven channels, AI agents, automations and the web widget. | §12 |
| Support tickets | Ticketing for your clients, bridged into the CRM inbox. | §12.3 |
| Content | Blog, static and legal pages, FAQs and news announcements — per panel, including per reseller. | Admin → Blog / Pages / FAQs / News |
| Landing page | An editable public landing page built from blocks you switch on, off and reorder, with eight designs: Nova, Horizon, Velocity, Momentum, Franchise, Boost, Neon and Pulse. | Admin → Website → Landing Page |
| Client storefront skins | Three client-area designs: Aurora, Vibrant and Midnight, selectable per panel. | Admin → Website → Client Portal |
| Social sign-in | Google (including One Tap) and Facebook, configured per panel. | Settings → Social login |
| Blacklists | Block by IP, link or e-mail, panel-local or global across every panel. | Admin → Blacklist |
| Reports | A year-at-a-glance calendar of payments, orders, tickets or profit. | Admin → Reports |
15.3 Changelog
Version 1.9.0
- New: the panel now tells you when your web server broke it, instead of just
looking broken. On the Nginx template most server control panels ship — aaPanel among
them — a rule catches every address ending in
.jsand serves it from disk, so one of the panel’s addresses comes back404and the JavaScript engine never loads. Every screen then paints perfectly and no button, menu or dialog does anything, with nothing on screen to explain it. The admin and reseller consoles now notice, name the exact address your server refused and the status it answered, hand you the one Nginx block that fixes it with a Copy button, and point at §14.1. Your clients are never shown it — the fix is nothing they can act on — and a correctly configured panel never sees it at all. - Fixed: amount boxes spoke the dollar whatever currency your panel runs on.
If your base currency has no cents — dong, yen, won — the Add Funds box
suggested
0.00and accepted a fraction that currency cannot express, and nothing rounded it afterwards: a deposit typed as500000.75was stored at.75while the screen printed500,001₫, so the customer was asked to transfer an amount no bank can move and the automatic matching could never find it. Those boxes now step in whole units and suggest a whole number, asked of the currency the figure is typed in rather than of the panel’s own — a currency does not acquire cents because it is being read in somebody else’s console. Panels in a currency with cents are untouched: the box behaves exactly as it always has. - Fixed: the Add funds box in Users printed a dollar sign next to a balance that was
not in dollars. The two lines around it — the customer’s current balance above
and the new-balance preview below — have always printed that customer’s own
currency, and the box in between was pinned to
$. A symbol in its own box sits on the leading edge, so it also could not honour a currency that writes its symbol after the figure. The currency is named in the label now, and the same change is in the reseller console. - New: your logo can follow the light/dark switch. Settings → Branding gained a third choice beside Logo Light and Logo Dark: Both. Pick it and the dark-ink logo is printed on light pages and the light-ink one on dark pages — on your home page, your blog, your FAQ, your legal pages, your service list and your sign-in screen. The setting was written when the landing page had one fixed design; every public surface carries a theme switch now, so “pick the variant that suits your skin” stopped being a question anybody could answer. It needs both files uploaded, because switching needs something to switch to: with one, the option stays on screen and tells you what it is waiting for rather than accepting a choice it cannot honour. This update does not change what your panel prints today — a panel that never opened this screen keeps its old answer, because an update has no business repainting the front page of a live business.
- Fixed: the blog, FAQ, legal pages, service list and sign-in printed a logo that could not be seen in dark mode. Those pages have always followed the visitor’s light/dark choice, and all of them printed the dark-ink logo either way — which on the dark theme is dark ink on a dark page. They switch automatically now, whatever you picked above, because they have no fixed background to pick a variant against. If you have only uploaded one variant they print it exactly as before.
- New: the sign-in, register and password pages carry a light/dark switch. Your
home page and your content pages already had one; this was the last public screen without it, so
a visitor who chose light on your blog walked into
/loginand got whatever the design opens with, with nothing on screen to change it. The switch sits in the top corner and writes the same setting the rest of the site reads, so the choice follows the visitor from your home page to the door and back. It is drawn by the panel rather than by the design, which means it is still there on a client-portal design installed from an add-on — a package can move it and restyle it, but it cannot take it away. - New: the colours of your admin console are now yours to set, light and dark separately. Settings → Branding gained a Console colours card with two rows — the page background and the cards & sidebar — and one swatch per mode in each. Under every swatch sits a line of sample text painted on the colour you are considering and the contrast figure it measures — before you save, not after — and a colour your own text could not be read on is refused with that number rather than accepted, because the screen you would need in order to undo the change is the one you would have just made unreadable. Picking a card colour also moves the shades that only make sense beside it — the table headers, the input fills and the hairlines — so the console stays one palette instead of a repainted card outlined in the colours of another; the page background is one colour and moves nothing else. Every swatch has its own Reset that returns that one to the shipped colour, and the console repaints as soon as you save or reset, with no reload. The four are independent, so setting one never touches the rest. A reseller gets the same four on his own Settings → Branding, saved against his panel alone: two consoles on one installation can wear different colours at the same time and neither can reach the other’s. This is the staff console only — your clients’ portal is dressed by its portal template and by any design add-on you install, and is not affected by these four. A panel that sets nothing stores nothing and looks exactly as it does today, so updating cannot repaint anybody’s console.
- Improved: the sign-in block on your public home page is no longer shown to a visitor who is already signed in. It used to stay on the page and swap its form for a “go to my dashboard” button — which left the eyebrow, the headline and the pitch beside it, all of it written for somebody who has not signed up yet, in front of a customer who already has an account. The whole block is now left out for them, and so is any menu link that pointed at it, so the menu can never scroll to a section that is not there. While you preview your own home page from the Landing Studio the block still renders (inert), so you can go on placing and wording it.
- New: a portal design can now redraw the sign-in, register and password screens. Until this release a design could hang decoration around the login card and nothing more, which meant a design drawn as a single centred column — with its own page-wide header, a patterned backdrop and a strip at the foot — could not be delivered at all. The design now supplies the arrangement of those three pages. What it does not supply is the form: the fields, the show/hide password eye, the social sign-in buttons, the error messages, the captcha and the Create account link are still the panel’s own, printed in one place inside whatever card the design draws, so a package cannot move a control, drop one, or slip an extra one in beside them — and switching the design off returns those pages untouched. The page shell itself (the marketplace preview break-out, the security token, the session handling) stays with the panel for the same reason: a faulty add-on must never be able to lock you out of the screen you would use to disable it. With no design add-on installed these pages are exactly as they were.
- New: a portal design can hand you one or two of its own colours to set. When the design you are wearing offers them, a Theme colours card appears under the design picker in Admin → Website → Client Portal, with a swatch and a hex box for each — the card background, for instance. The rest of that design’s shades are mixed from what you pick, so the softer surfaces, the dividers and the raised chips follow it instead of one surface going out of step with the others; each colour carries a Reset that puts it back to what the designer shipped. Two things this deliberately is not: it is not your brand colour — that stays in Settings → Branding and applies to every design, including the ones that ship with the panel — and it is not a full palette editor, because a design has dozens of tones and only the one or two it names can move without risking text and background ending up too close to read. The card is absent on the designs that come with the product, and a panel where you have chosen nothing renders exactly as it did before. A reseller gets the same card on his own Website → Client Portal screen, for whichever design you assigned him: the colours are stored on his panel, so two stores wearing the same design can carry different colours at once and neither can reach the other’s. His swatches follow the design his store is actually wearing — if he picks a different one in the list above, he saves that change first and the card then offers the new design’s colours.
- New: a design add-on can now dress the whole customer portal, not only your public site. Until this release a portal design could re-colour the screens the panel draws and no more; a design may now redraw the frame and every signed-in screen — dashboard, order form, order and drip-feed lists, subscriptions, catalogue, tickets, Add funds, transactions, news, the API page and the profile. You still pick it in Admin → Website → Client Portal exactly as you pick Aurora, Vibrant or Midnight, and which designs a reseller may use is still governed by their plan, so nothing your customers see changes until you choose one.
- New: a portal design may drop the panel’s own styling, but only after it has redrawn every screen — and the panel verifies that itself. Your public page has a fallback if a design leaves a section unpainted: it simply looks plain. The portal has none, so a design that dropped the panel’s styling having forgotten one screen would hand a paying customer a page with no layout at all, on whichever screen nobody happened to open. The privilege is therefore not something a package can declare: the panel checks that every screen is covered and, when one is missing, keeps its own styling and lets the design paint on top — which is what portal designs did before this release.
- New: your customers can filter their own ticket list by status. A row of tabs — All, Open, Answered, Awaiting, Closed — sits above the list in every portal design, each showing how many tickets are behind it. The counts follow the search box rather than the whole table, so the number on a tab is exactly the number of tickets that tab opens; a status with nothing in it keeps its place and goes inert, so the row does not move about as tickets change state. Awaiting is the customer’s view of a reply of theirs your team has not answered yet.
- Fix: a payment method your customers cannot use is no longer offered to them at checkout, and the Payments screen tells you why. Switching a method on is one thing; being able to take a payment is another, and Add Funds was not asking the second question. A method reaches that state two ways, and neither left a mark anywhere: its credentials were never filled in, or the add-on that provides the gateway was uninstalled or switched off while the method stayed on file. In the second case the customer got an error page on the screen that collects your money. Both are now hidden from checkout and named in red under the method’s name in Admin → Payments, each pointing at the screen that fixes it — Add-ons for a missing package, the method’s own settings for missing credentials — so a method nobody can use is never quietly absent. Your reseller top-up screen already behaved this way; this brings the customer’s to match.
- Fix: the quick-pick amounts on Add Funds now enter the figure they show. On a panel whose display currency differs from its base currency, a button reading “16,666.67” was writing the unconverted figure into a box priced in the display currency, so what landed there was a fraction of what the button offered and the deposit was refused for falling outside the method’s range — a shortcut whose only possible outcome was an error. Invisible on a panel where the two currencies are the same. The highlighted button now also follows the box at once rather than lagging a step behind.
- Fix: an amount that no longer fits the method you just picked now says so before you press the button. Your amount is kept on purpose when you switch methods, so you do not retype it while comparing gateways — but each method carries its own minimum and maximum, so a good figure can become an impossible one. The only feedback used to arrive after pressing Continue to payment; the min/max line now turns red and says the method cannot take that amount.
- Fix: the note a customer leaves on an order is now shown in Order details, on your Orders screen and on a reseller’s. It was stored and editable, but the details panel skipped it, so an instruction the customer wrote when ordering could only be found by opening the order for editing. The customer could always read their own note; the desk that has to act on it could not.
- Fix: the “you are viewing the panel as” notice is now a tab at the side of the screen instead of a strip across the top. The strip sat in the page and pushed everything down by its own height, so the screen a staff member was reviewing was never quite the screen the customer sees. Click the tab and it tells you whose account you are in, which account you will return as, and carries the same button back. It also gets the wording right inside a reseller’s console, where it used to offer “Return to admin” even when the way back was to that reseller’s own panel.
- Fix: the service search in your customers’ header prices in your currency. It printed a dollar sign and four decimals whatever currency your panel sells in — so a panel selling in dong quoted dollars in its own header, with small change for a currency that has none. The rest of the panel already had this right; this one spot built the price in the browser, where the rule could not reach it.
- Fix: the Vibrant portal no longer offers Support or Drip-feed when those modules are switched off, and your customers’ profile page no longer offers an API key when the API is switched off. In each case the link was there and led to a page they could not open; the sidebar and the account menu already checked, and the other portal designs already hid them.
- Fix: the Vibrant portal says why an order was refused when the quantity box is empty or not a number. The order was rejected and nothing appeared on screen — the message was produced and had nowhere to show. The minimum and maximum hints under the box are not the same thing: those are worked out in the browser from the service.
- Fix: labels printed on top of your brand colour are readable on a light brand. They were always printed in white, so on a yellow, lime or cyan brand the numbered steps on your Terms page and the View button in the catalogue and ticket lists were effectively invisible. They now use the ink the panel already works out for your colour — the same one it uses for the initial that stands in for your logo. Nothing changes if your brand is dark.
- Fix: the unread count on the notification bell is readable. It was white on the alert red, which is too faint at that size even with the panel’s own colours, and fainter still under a design that lightens that red.
- New: you can now tell the panel which currency a provider bills you in. It was set to USD the moment you connected the provider and only Check balance could ever change it, so a provider whose API does not report a currency — and many do not — could not be converted at all. The Edit form now has a Provider currency field in both the admin and the reseller console, with an Unknown option that keeps the old behaviour of falling back to the manual rate. Check balance still updates it whenever the provider does report one.
- Update: “Convert to new currency rate” says what it will do before you tick it. The box never named the rate it would apply, and there are three different answers behind it, so you only learned which one you got after the services were in your catalogue at the wrong price. The import bar and the Bulk Import window now read, for example, “This provider is priced in INR. Costs will be converted to USD at × 0.012”, or name the manual rate from Settings → Currency. When the provider already bills in the currency your panel sells in, it says so plainly — there is nothing to convert. The amber warning is reserved for the case that needs you: a provider whose currency has not been set, or one priced in a currency with no rate in Admin → Currencies, where ticking the box would import the prices exactly as the provider quotes them.
- Update: the admin now explains how to switch reseller sub-domains on. They ship
turned off on purpose (see §4.5), and the Create reseller
screen used to say only “set RF_PANEL_BASE_HOST in your .env”, which reads like a
fault. It now lists the three steps — the
.envline, the wildcard DNS record and the wildcard TLS certificate — points at §4.5 and §9.3, mentions the two variables a reseller's OWN domain needs, and says plainly that you can create the reseller now and give it an address later. - Fix: your public pages now have a menu on a phone. The header bar hides its links on a narrow screen because they do not fit — but nothing replaced them, so every entry you write in the Landing Studio, along with your catalogue and your blog, could not be reached at all from a phone, and no button on screen suggested a menu was there. A menu button now opens a side panel carrying exactly the entries the bar shows, with Sign in and Get started at the foot. It covers your home page in all eight designs and your blog, FAQ, terms and catalogue pages. Nothing changes on a computer.
- New: customers can leave a note with an order. A Note for the team box sits on the order form just above the confirmation, in all three client designs — delivery instructions, a reference of their own, anything the form has no field for. It is optional. The customer sees it again in Order details, and your staff read and edit it in §7.5 Admin → Orders (and in Drip-feed and Subscriptions) in a Client note box of its own. It is deliberately kept apart from Note / API response: that box is where your provider's answer is written and it is rewritten automatically, so a customer's words placed there would have been erased the moment the order went through.
- Fix: the header on a phone now shows your logo and the menu button, and nothing else. The theme switch and the Sign in / Get started pair were still in the bar beside them, so four things competed for the width of a phone and the one that gave way was your logo — it was cut off mid-word. Both are now inside the menu (the switch at the top, the pair at the foot), so nothing is lost and your brand stays whole. Same eight designs and the same content pages as the entry above; nothing changes on a computer.
- Fix: clearing the chosen category on the order form now really clears it. The × beside the category emptied the field but kept the filter for the social network that category belonged to, so the list reopened on the same handful of categories and the only way back to the whole catalogue was to reload the page. It now returns the full catalogue, and the × shows a hand cursor like every other button.
- Fix: the category picker behaves the same way in every client design. On Vibrant, clicking a category you had already chosen reopened the list with the choice still visible so you could pick another, and only the × cleared it. On the other designs the whole field was the clear button, so touching it threw the choice away and left the client searching again for something they had already found. Every design now opens the list on a click, keeps the selection shown and ticked, offers a search box inside the panel, and clears only from the × (§7.1).
- Fix: the notification panel no longer opens off the side of the screen on a phone. The panel hangs off the bell, and on a narrow screen the bell sits in the middle of the header row — the theme switch, the language menu, the balance and the avatar all sit to its right — so the panel began past the left edge of the screen and its first words were unreadable. On phones it now spans the screen under the header instead of hanging off the bell; on a computer it is exactly where it has always been. This covers every screen that has the bell: the admin console, the reseller console and all three client designs.
- Fix: importing from a large provider catalogue no longer fails with a server error. The catalogue was held in the cache as one single entry, and a real catalogue does not fit in one — past a few thousand services it goes over what the cache table column and the database packet size accept. The failed write took the whole Manage catalogue screen with it: browsing, filtering and both import buttons. The catalogue is now stored in small pieces, and if your cache still refuses it the screen works without the cache rather than breaking. See §14.2 if you run a very large catalogue.
- Fix: “Convert to new currency rate” now works when you import services by picking them — Import selected, Import all filtered, Import a category, Import all and the per-row Import button, in both the admin and the reseller consoles. It used to exist only in the Bulk Import window, so a panel priced in a different currency to its provider imported those services at the raw provider rate, even though the setting said the rate applied to “a catalogue sync or bulk import”. Services you already imported are never touched: the box only affects rows imported after you tick it.
- Fix: when a provider catalogue cannot be fetched, the screen now tells you why (timeout, refused connection, rejected key) instead of showing an empty table that looked identical to a provider with nothing to offer.
- New: an installed design can dress your whole public site, not just your home page. Your blog, article pages, FAQ, terms, custom pages, services catalogue and sign-in screens now follow the design your home page is wearing, so a visitor who clicks Blog no longer walks out of the design they were looking at. The designs that come with the product look exactly as they did.
- New: a design may add sections of its own, and you word them. They appear in Admin → Landing beside the built-in blocks — you move them, switch them off, and edit their headlines, text, links and repeating cards in the same Landing Studio, with the same live preview, Save and Restore. There is no second editor to learn, and the words you write stay yours even if you switch the design off and back on.
- New: light/dark on your home page, using the switch the rest of your public pages already had and remembering the same choice — a visitor who reads your blog in dark comes back to a dark home page. The switch is offered on designs drawn light; a design that is dark by nature keeps its own palette and shows no switch.
- New: demo mode for a public demo that signs strangers in as the administrator. The actions that write files — installing an add-on, saving a language, applying an update — are refused with an on-screen explanation, because a database restore cannot undo them. Everything else keeps working. A panel that is not in demo mode is untouched.
- New: your blog can be opened filtered by category from a link
(
/blog?category=<category>), and your public FAQ can be searched and filtered by topic from the address bar — so a visitor can share a link straight to what they found. You can also set a topic on your own FAQ entries in Admin → FAQs, which until now only your resellers could do. - Security: the Livewire library the panel is built on is updated to 3.8.9,
closing a cross-site scripting advisory published against the version shipped before
(CVE-2026-81887, rated medium). Nothing of yours changes and nothing looks different — but
if you run
composer auditon your own server, this is the advisory it was reporting. Updating the script is all that is needed. - Fixed: your translations can no longer be lost by an update, whichever way you
update. A copy of every language you save is kept where no update reaches and restored
automatically afterwards — from the panel, from the
/updateassistant, or withphp artisan app:restore-languages. This manual also told you to delete thelangfolder before uploading a new version; that instruction was wrong and is corrected in §3.10 — upload over the top, never delete first. - Fixed: a panel installed in a currency other than the US dollar now works in that currency everywhere. Your customers were shown multiplied figures while your own console showed the right ones — a wallet your console read as 537 read as 13,769,610 to its owner — because the exchange-rate table ships priced against the dollar and your own currency has to be the one everything else is priced against. The same assumption reached the figures the product writes for you on day one: the three reseller plans were seeded at 0 / 49 / 99 whatever you installed in, so a panel in Vietnamese dong offered its paid tier for 49 dong. Updating repairs the rates for you, and a panel running in dollars is not touched at all. New installations get those day-one figures in their own currency as well — but on a panel that is already installed, a price you could have edited yourself is not overwritten by an update, so open Admin → Plans once after updating and check your three tiers: if they still read 0 / 49 / 99 they are the seeded dollar figures and you want to restate them in your own currency. See §8.4.
- Fixed: currencies with no small unit are no longer written with cents, and a
currency whose symbol belongs after the amount now prints that way —
100₫rather than₫100,100 złrather thanzł100. A catalogue in dong was listing 28,205.1282 per 1000 on the first screen a customer opens. Both are facts about the money rather than preferences, so each currency now carries its own, with a Reads as column in Admin → Currencies showing the result at a glance; how many decimals your panel shows is still one choice for the whole installation. Five shipped currencies are corrected for you and nothing you edited by hand is changed. See §8.4. - Fixed: the top menu of the customer panel no longer runs over the wallet balance. Entries that do not fit move into More and come back by themselves on a wider window.
- Fixed: the letter shown in place of your logo is readable again on light brand colours — a panel branded in yellow or lime was drawing a white letter on its own colour.
- Fixed: Sync services now tells you why it failed instead of always blaming your
credentials, and the time allowed to CONNECT to a provider can be raised separately with
RF_PROVIDER_CONNECT_TIMEOUT(see §4.7). A provider that timed out after five seconds no matter how high you set the other value was hitting this limit. - Fixed: the installer offers Try again when a step fails and carries on from where it stopped, and it no longer says “Step 7 of 6” on a phone.
- Documentation: this manual now covers the Nginx setup that leaves a freshly installed
panel painted but dead — every screen looks right and no button, menu or dialog does
anything. It is not a fault in your upload: several server control panels ship an Nginx template
with a rule that catches every address ending in
.jsand serves it from disk, and one of the panel's addresses is answered by PHP instead of being a file. §14.1 has the one block that fixes it, the reason a site behind Cloudflare keeps failing after the server is already fixed, and two ways out if your host will not let you edit the configuration. Apache and LiteSpeed were never affected. - Fixed: on the Vibrant customer portal, a customer can leave a social network again once one has been picked. Choosing a network — or simply picking a category — narrowed the category list to it with no way back short of reloading the page, so a customer who came for Instagram and then wanted TikTok appeared to have lost the rest of your catalogue. An All networks button now sits beside the network tiles. The other portal designs always had it.
- Fixed: service names are no longer cut short on the Vibrant portal. They were trimmed to about fifty characters, and imported catalogues put the quality and the guarantee at the end of the name — exactly the part that disappeared, leaving two different services reading identically. Names now wrap in full in the list, and hovering shows the whole name in the closed field and in Order Logs.
- Documentation: and the other way a host can block a screen — a 403 Forbidden page from your web server shown inside a box with the panel still around it. That is your firewall (ModSecurity, enabled by default on most control panels) refusing a value that merely looks like a file path, before the panel ever sees it. §14.1 shows how to confirm it in a minute and exactly what to ask your host for.
- New: a customer can choose the currency for a SINGLE payment, on the Add Funds page itself. The choice used to live in their profile, where picking a currency to pay in also repriced your whole storefront for them. The page now says in plain words what will be charged and what will be credited — and it says it with the form still empty, which is the state a customer actually arrives at. Your resellers' top-up screen says it too; it never did. See §8.4.
- New: a payment method is checked before your customers meet it. A gateway that can only settle in a currency you never added, or in one still sitting at an exchange rate of 1, would have collected the wrong amount with nothing on screen admitting it. Admin → Payments now prints what is wrong under the method's name, in red, before you switch it on. See §8.4.
- New: every gateway credential now has its own label and an (i) explaining it. The name and the explanation used to share the placeholder inside the box, where a one-line field cut the explanation off exactly where it became useful. See §8.2.
- New: the license screen accepts a purchase code OR a license key, because the product is sold in more than one store. Nothing changes for a CodeCanyon purchase code.
- New: you can move the figures strip yourself. In Admin → Landing the Stats strip row now has the same up and down arrows as every other section, so it no longer has to sit in the gap under the hero.
- New: add-ons can add their own fields to four more forms — the client sign-up, a new support ticket, the profile screen and the reseller signup — the same way they already could on the order form. See §16.4.
- Fixed: a deposit was refused for being “outside the allowed range” while it was inside it. A gateway that settles in one fixed currency had its limits compared against the raw number, so 500,000 in a currency worth a fraction of a dollar was judged as 500,000 dollars and turned away. The same screen also named the wrong currency above the box — “Amount (USD)” over a payment about to be charged in naira.
- Fixed: the installer no longer fails on hosting that still creates tables with the
MyISAM engine, where it stopped at the very first table with
SQLSTATE[42000] … 1071 Specified key was too long. And when something your HOST controls stops the installation, the screen now explains it in plain language before showing the server's own message: wrong database password, database not created yet, connection refused by a firewall, or a user without privileges. See §14.1. - Fixed: your site no longer opens light in one place and dark in another. The light/dark choice a visitor makes is now honoured by every public page; your sign-in, blog, FAQ and terms pages used to open dark whatever you had chosen.
- Fixed: your home page menu no longer shows the same entry twice, and the sign-in card on your home page is no longer filled in by the visitor's browser — on a shared computer that showed the next person the previous one's email.
- Fixed: your public service list no longer invites visitors to open an account when you are not taking any. With sign-ups closed, or in reseller-only mode, the button led straight to a page that turned the visitor around; it now offers the door that IS open, or no button at all when none is.
Version 1.8.0
- New: your blog has a way in from the home page. A Blog entry appears in
the landing menu on its own as soon as you have a published post, and goes away again if you
switch the Blog module off — or, on a reseller's storefront, while that reseller has not
written anything. Until now
/blogwas linked only from the other public pages. - New: a Latest posts block for the landing page — your three most recent published posts as cards, with a button through to the full blog. Add it, move it and word its heading in Admin → Landing like any other block. It ships switched OFF, so your home page is unchanged the day you update, and it hides itself while nothing is published.
- Improved: the text editor gained an HTML button — see and edit the markup
behind a post, page, FAQ or news item, then switch back. Both views edit the same text, so you
can save from either. Anything richer than the toolbar can produce is named on screen before you
save, instead of disappearing afterwards. (The
<>button next to it is a different thing: it puts a few words in code style.) - Improved: a blog post now reads in a proper column instead of running the full width of the page, with a More posts panel down its side so the page still fills its width and a reader who finishes one article is offered the next. The panel shows the same category first and tops up from the rest of your blog, so it is never half empty; on phones and tablets it becomes a row of cards under the article.
Version 1.7.0
- New: gateway fees are charged, and you decide how. Every payment method gained a Who pays the fee setting — do not charge it, add it on top, or take it from the balance — plus a choice of whether the customer sees the fee itemised before paying. Until now Fee % and Fixed fee were saved but never charged. See §8.2.
- New: every payment method that already exists is set to do not charge it by the update, so no customer pays a cent differently the day you upgrade. A method holding a fee nobody is paying now says so in the list.
- New: the deposit receipt itemises Deposit, Payment fee, Total paid and Total credited instead of a single subtotal.
- Fixed: your translations survive an update. Languages you added, and wording you corrected in the ones that ship, used to be replaced by Admin → System Update. They are now merged. See §3.10.
- New: themes. Your panel can take extra designs from an add-on, for the public landing page and for the client portal. A theme is installed in Admin → Add-ons like any other package and then appears in Admin → Landing and Admin → Appearance beside the designs that ship with the product, with the same Apply and Preview buttons. See §16.5.
- New: a design from an add-on obeys the reseller rules you already set — which designs a plan includes, and which of those a particular reseller may use — so it can be part of a higher tier instead of being given to everyone.
- Improved: your brand colour now wins over any design, including one from an add-on. The colour set in Branding is applied last on every screen.
- Improved: turning a theme off, removing it, or moving to a plan that no longer includes it never leaves a blank page — the panel falls back to a design it is allowed to use on the next page load.
- Fixed: nothing changes on an existing installation until you choose a new design. The designs the product ships cannot be redefined or overwritten by an add-on.
- Fixed: a broadcast that reached nobody is no longer reported as sent. Admin → Broadcast used to show a green Sent beside zero recipients when the mail server refused the messages. The list now says whether the blast was delivered, partly delivered or not delivered, how many mailboxes it could not reach and the reason your mail server gave — on screen, without enabling any log file.
Version 1.6.1
- New: Verify with provider on a pending deposit. When a payment method can check a payment with its provider, Admin → Deposits and Admin → Transaction Logs show a one-click verify action: the reference the customer gave is checked and, when the provider confirms it, the wallet is credited immediately. Until now only Binance Pay had this.
- New: customers can confirm their own offline payment. After paying, Add Funds asks for the reference on their receipt; a confirmed payment credits the balance at once, and an unconfirmed one leaves the usual proof upload in place. Nothing is credited without a confirmation.
- New: resellers get both — the same confirm step when they top up their own balance, and the same verify action on their customers' deposits in Panel → Deposits.
- Improved: the All methods filter in Deposits now lists every payment method the installation has, add-on methods included (it was a fixed list of five).
- Improved: add-on payment methods that collect money offline can be approved and rejected from Deposits like any other offline method.
- Improved: returning to an unpaid deposit restores the payment details for add-on methods too, so a customer who closed the page can carry on where they were.
- Improved: confirmation attempts are capped at ten per customer per hour, so the form cannot be used to guess another customer's reference.
Version 1.6.0
- New: license activation. The installer gained a License step (purchase code from your Envato Downloads page); one code activates one production domain, local and staging hosts are always free.
- New: Admin → License screen — activation status, re-check on demand, and a one-click release to move the installation to another server.
- Improved: existing installations keep working untouched: updates never ask for a code mid-update, a banner offers activation with a 14-day window, and only a confirmed refund/chargeback ever pauses updates and add-on installs (after a further 7-day grace).
- Fixed: panels whose base currency is not USD no longer see the dollar symbol on amounts in Admin → Payments (Min/Max), Payment Bonuses, Subscriptions, Drip-feed and Transaction Logs, or on the reseller’s My Payment Methods page — every amount now carries the symbol of the currency it is actually stored in (the figures themselves were always correct).
Version 1.5.1
Fixed: updating from 1.3.x no longer shows a brief server error at the moment
the new files are applied — every screen involved in an update (the update screen, the panel
layout and the “we are updating” page) can now be rendered safely by the previous
version while the switch happens, and the “we are updating” page is fully
self-contained so it can never fail when it is needed.
Improved: while an update is applying its files, an admin who browses to another
page sees the “we are updating” notice instead of a half-updated page (the System
Update screen itself stays available), and the PHP opcode cache is reset automatically after
every update — from the System Update screen and from the /update assistant
alike — so aggressive host caches cannot keep serving the old version.
Version 1.5.0
New: an amber ticket badge in the admin menu shows how many tickets are waiting on staff (new tickets and customer replies); it updates live as tickets are answered or closed and the reseller panel gets the same badge for its own tickets. Email alerts for the operator: a new ticket, a new deposit (gateway payments and offline deposits awaiting approval) and every new customer sign-up now also send an email to the staff who handle them, so you stay updated without being logged in — all three messages are editable under Admin → Email Templates (“New ticket alert”, “New deposit alert”, “New sign-up alert”). Ticket categories manager: Admin → Tickets → Categories lets you define your own categories and subcategories; they replace the built-in list (AI Support, Fake Complete, Human Support) on the customer's new-ticket form. Rename, hide or delete them at any time — existing tickets always keep the category they were opened with, and with no custom categories the shipped list keeps working as before. Broadcast: Admin → Broadcast composes one message and emails it to every customer of your panel without publishing anything on the site (ideal for “new payment method”, “new services” or maintenance notices). Messages are sent individually so recipients never see each other's addresses, delivery runs in the background, and every past broadcast stays listed with its recipient count. DB: two new tables (ticket_categories, broadcasts); both migrations are additive and run automatically during the update.
Version 1.4.2
Fixed: updating from an older version (1.3.x and earlier) through the System Update screen no longer ends in a server error at the moment the new files are applied. Right after the swap, the still-running old version used to draw the new screen and crash on routes it never had; that screen now detects the situation, shows “New version applied — reloading” and reloads itself, and the new code finishes the database and cleanup steps on its own. If you ever see an error on that screen mid-update, simply reload the page — the update completes itself. Changing your profile photo now shows the new photo immediately on every screen: each upload is stored under a fresh filename, so browser and CDN caches can no longer keep serving the previous picture (admin, client and reseller profiles).
Version 1.4.1
Fixed: the in-app updater now survives hostings that kill the request which swaps the new files into place — the next progress tick recognises the files are already on the new version and carries on with the database and cleanup steps instead of stopping with “No staged update found”, and reloading the System Update screen finishes a half-applied update on its own even when the release carries no new database changes. The moment the files are applied no longer renders a reply from mixed old/new code, which could produce a server error on some hostings. Improved: after a successful update the applied ZIP is removed from “Available packages” automatically, so a stale Update button can no longer invite a second run of a package that is already installed.
Version 1.4.0
New: Automatic cleanup of unpaid panels, with fair warning
— a reseller panel suspended for non-payment is kept for a retention period (30 days as
shipped; RF_PURGE_SUSPENDED_AFTER_DAYS in .env, 0 disables it) and
then permanently deleted by the billing cron. The reseller is warned by e-mail and in-app
notification at 14/7/3/1 days before the date, renewing cancels the countdown, their own login
and wallet balance always survive, and panels you suspended by hand are never touched (see
§10.6). Paid plans in “Get Your Own Panel” — existing
customers upgrading to a panel can now contract any public plan, funds-first: the review step
shows the price next to their balance, the first period is charged from the wallet at creation,
and an insufficient balance blocks the conversion with an “Add funds first”
shortcut (see §9.8). Security: on installs with no free public plan, a
paid no-trial panel created through the public signup is now born locked until its first period
is paid — it can no longer operate through the grace window unpaid.
“Get Your Own Panel” inside the customer
dashboard — when the reseller signup is open (see §9.8), logged-in
customers get a sidebar entry that launches their own white-label panel on their existing
account: balance and details carry over, no second registration. The page shows your live
plans and a review step — the panel is only created after the customer explicitly
confirms converting their account, and a link offers registering a separate reseller
account instead. Custom comments on
the order form — services of the “custom comments” /
“mentions with custom list” type now show a comment box on the New Order page
(one comment per line; the receipt prices the order by the number of lines —
previously these services could only be ordered through the API).
An automatic notification system across the whole
panel. Customers get an in-app notification (bell) and, where it matters, an email the moment
something happens to them: a support reply (deep-linking straight into the ticket, whether
staff answered from the ticket screen or the CRM inbox), an order confirmation and its
outcome (completed / partial / canceled / refunded), and every credited deposit — any
gateway or a manual approval. Operators are pinged too — and since v1.5.0 by email as well as bell: new tickets
reach the staff who manage tickets, deposits reach the money managers, and new
sign-ups reach the user managers. On a reseller panel all of this goes to the reseller,
never the parent panel's staff. Broadcast announcements: publishing a News
item now offers “Notify my customers” (with an optional “Also send it by
email” box) — every customer of the panel gets a notification linking to the
announcement; each announcement broadcasts only once and the fan-out runs in the background.
Resellers have the same option for their own storefront News. Four new editable email
templates back these messages (Admin → Email Templates → “Orders, Deposits
& Support”: Order received, Deposit credited, Ticket reply, Announcement), each
with placeholders, live preview and test send.
Also new: full right-to-left (RTL) support — every screen (landing page,
client portal, admin area, reseller panels and e-mails) mirrors automatically whenever the
visitor's language is marked as RTL in Admin → Languages. An Arabic
translation (100% of the interface, Modern Standard Arabic) is included out of the box
and ships already marked as RTL — enable it in Admin → Languages. An optional
WhatsApp number at sign-up: turn on Settings → Default setting →
“Ask for a WhatsApp number at sign-up” (resellers have their own switch in Panel
Settings) and the registration form gains an optional WhatsApp field; the number shows in
Admin → Users and is editable there and in the client's Profile.
The client portal's support chat now uses honest branding: it presents
itself as “AI Support” only when an active AI agent is configured, and as plain
“Support” (human team) otherwise; its red button is now labelled
“Create New Ticket”.
Improved: chat content in the CRM inbox (bubbles, previews, internal notes)
lays out each message in its own language direction, so mixed-language conversations read
naturally either way; URLs, phone numbers and e-mail fields keep their left-to-right order
inside an RTL interface; 30 previously untranslatable interface strings (payment and
integration form hints) were added to the language files.
Fixed: installations made from an early package could serve stale uploaded
images (profile pictures, blog covers, payment-method logos) — updating now repairs the
storage link automatically and existing uploads are kept; service rates no longer show dead
trailing zeros (a whole-number rate on a 0-decimals panel reads 18,200, not
18,200.0000, while sub-cent rates keep every meaningful decimal); New Order and
Mass Order forms no longer overflow the screen on mobile when a service has a long name; one
Binance manual payment instruction that appeared in Spanish on English installations is now
properly translatable.
Version 1.3.12
Fixed: outgoing e-mail (SMTP) failed on every installation with
“The ‘tls’ scheme is not supported” as soon as SMTP was
configured in Admin → Settings → Email. The panel now derives the transport scheme
from the encryption you pick (SSL → smtps, STARTTLS/none →
smtp), so the settings saved in the admin are always the ones used to send.
Updating fixes existing installations as-is — no .env changes needed.
Version 1.3.11
One major update carrying everything built since v1.0.2: wholesale pricing so resellers can undercut you and still earn, self-serve reseller signup, add-ons, one-click updates from the admin panel, a notification centre, per-panel languages, a live CRM inbox — and a long list of fixes across the reseller pricing chain, per-panel account isolation and the client experience.
Updating from v1.0.2: v1.0.2 predates the System Update screen this release
introduces, so this one update is applied by uploading the files and finishing at
yourpanel.com/update — see §3.10. Every
later update can then be applied from Admin → System Update in one click.
- New — wholesale pricing. Plans and individual resellers take a catalogue price adjustment that can be negative, so a reseller buys below your retail price and undercuts you while you still earn on every order. A discount never goes below your provider cost — the floor is applied service by service (§8).
- New — resellers as a business of their own. Self-serve reseller signup from a public plans page, resellers connect their own payment gateways and approve their customers' transfers from a Customer Deposits screen, and a reseller-only mode closes your direct client area entirely.
- New — add-ons. Gateways and extensions install from a ZIP under Admin → Add-ons, keep their own version, settings and migrations, survive every panel update, and can extend the New Order form. Payment gateway add-ons are available separately (§16).
- New — updating without a shell. Admin → System Update applies
a release ZIP with backup and rollback, keeps a code backups panel and an update history; the
assistant at
yourpanel.com/updatecovers shared hosting without SSH (§3.10). - New — installs with a locked document root. Extract everything into
public_htmland the included root.htaccessforwards requests topublic/automatically while refusing to serve files such as.env(§2). - New — notification centre. A bell in the header of the admin, reseller and client areas with unread badges and a filterable history; pending deposits show a live badge in the menu.
- New — languages per panel. Each reseller picks which installed languages their panel offers and the default one; the language a customer picks follows their account.
- New — self-updating exchange rates from a public market feed every six hours, with an optional exchange margin. No API key.
- New — home page. Five new landing skins (Momentum, Velocity, Franchise, Boost, Neon) and three new blocks: a working sign-in card, a payment methods row and a reseller pitch — all managed from the Landing Studio.
- New — plan-level gateway selection and price rounding. Plans choose which gateways each tier may connect; rounding defaults to 4 decimals with a per-panel override for resellers on their own providers.
- Improved — live CRM inbox. Conversations open at the newest message, follow incoming messages automatically and refresh every few seconds while open; messages land within seconds even with no queue worker and no cron (§13.4).
- Improved — plan purchases. A receipt with the balance left, upgrades paid up front from the panel's own balance, and self-serve signup contracts the free plan only.
- Fixed — connecting Meta channels from reseller panels. The OAuth
flow always returns to the single registered redirect URI
(
{APP_URL}/crm/oauth/callback) — one URI in your Meta App serves the owner panel and every reseller (§12). - Fixed — the reseller pricing chain. Commissions that reached only half the catalogue, margins applied twice, catalogues frozen by a rounding change and imports that ignored the panel's commission: the markup you type is now the markup you get, everywhere a price is shown.
- Fixed — revenue reports. Reports counted a reseller's margin as yours; orders now record your own profit on the order itself, and orders a reseller fulfils with their own supplier no longer reach your admin queue.
- Fixed — per-panel account isolation. Password recovery resolves inside the visitor's panel, reset links are stored per account, e-mails to a reseller's customers carry the reseller's name, and nobody can take over a reseller's sign-in from their storefront.
- Fixed — client experience. Header search prices and matching, friendly session-expired dialogs instead of raw 419 errors, dark-theme readability, mobile landing pages, drip-feed confirmations, single-currency invoices and more.
- Database. New tables and columns are applied automatically by the update
assistant or System Update; the manual path is
php artisan migrate --force.
Version 1.0.2
This release makes every switch, field and dropdown in Settings do what its label says. We reviewed all of them and reconnected each control that was not wired to anything.
- The Currency tab could not be saved at all. Separators, decimals, default markup, rounding and the conversion rate appeared to save but stored nothing. All six fields now save, including a space as the thousands separator.
- Settings → SEO now reaches the home page. A meta title and description entered there applied to the FAQ, Terms, blog and content pages while the home page kept the text it shipped with. The SEO fields inside the Landing editor still win for the home page when filled in; left empty they now inherit the site-wide values. The home page also publishes a canonical address, a share image and the indexing preference, which it did not before.
- robots.txt now follows the indexing switch. A file shipped with the script
was served instead of the live one, so the switch changed the page tags but never the file a
crawler reads. An empty
favicon.icoplaceholder shipped beside it has been removed as well, so a browser follows the icon declared by your Branding settings. - The sitemap and the canonical tags now name the same host when a canonical host is configured.
- “Rows per page” now reaches every list screen. Around twenty screens stayed on fifteen rows whatever you typed. A few whose layout depends on their own page size keep it on purpose.
- “Date format” and “Timezone” now apply everywhere a date is shown, including invoices and PDF exports, with month names in the interface language. A signed-in user’s own timezone takes precedence. Stored data is unchanged.
- A reseller’s “Disable signup” switch now closes their own storefront. Registration on a reseller’s domain was decided by the platform owner’s switch in four places, including the step that creates the account.
- Sign-up links are hidden when signups are closed — on the sign-in page and on the home page, which both kept inviting visitors to register.
- Analytics IDs are validated instead of silently discarded. A malformed GA4, Google Tag Manager or Meta pixel ID saved without complaint and was then never used.
- The “Enable API” switch now closes the API — the public endpoints, the documentation page and the client’s API-key screen, which all stayed open regardless. It is now labelled “Enable public API”.
- “Auto convert currency” is applied when importing a provider catalogue.
- The password hint on the profile screens shows your configured minimum instead of always reading “at least 8 characters”.
- The support e-mail, phone and working hours now appear on the default client skin, which did not include the footer that shows them.
- A quotation mark in the landing page’s font setting was written into the page in a form the browser could not read, so the heading font fell back to a default. Colours, fonts and skin values are now written correctly and checked before use.
- Removed the unused “Orders for average-time calc” field from Settings → Defaults. It fed no calculation in the product.
Version 1.0.1
- Signing in after a session has expired now returns you to the sign-in form. A login page left open longer than the session lifetime — or one whose session the server discarded for any other reason — used to answer the submit with a blank “419 Page Expired” screen with nothing to click. It now reloads the form, keeps the e-mail you typed, and explains that the session expired.
- The session cookie name is written into
.envduring installation instead of being derived from the application name on every request, so renaming the panel later no longer signs everybody out. - The installer no longer corrupts database passwords containing
$followed by a digit when writing them to.env. - If the application cannot write its own
.env, the first page now says so and tells you which permission to change, instead of failing with a generic server error. - The public landing page now uses the favicon uploaded in Settings → Branding.
- The landing page’s video player fills its frame correctly, and no longer ships pointing at a sample clip: the “Watch demo” button appears once you set your own video URL.
Version 1.0.0 — first public release
- Six-step web installer with a live requirements check, a real database test and a choice between Production and Demo seed data.
- Upstream provider manager for the standard SMM API, with connection test, catalogue sync with per-field control, public-page metadata scraping, balance monitoring, retries and a circuit breaker.
- Catalogue of platforms, categories and services with bulk activation, hiding, deletion and re-pricing.
- Order pipeline with honest states, background dispatch and polling, refill, cancellation requests, drip-feed with scheduled runs, and bulk ordering.
- Immutable wallet ledger with ten entry types, manual adjustments, top-up bonus tiers and display currencies.
- Payment methods: manual proof of payment with admin approval, Stripe and PayPal with signed webhooks.
- Reseller child panels with platform subdomains, DNS-verified custom domains, own branding, own skins and cascading margin rules.
- Reseller subscription plans with a module matrix, catalogue markup, domain allowance and the own-provider gate; wallet auto-debit billing with trials, grace, dunning e-mails and automatic suspension; reseller self-service billing and plan switching.
- Plan-gated own external provider for resellers, with isolated services and single-wallet order money.
- Public API compatible with the standard SMM format, with idempotency keys, rate limiting and signed outgoing webhooks.
- Omnichannel CRM: unified inbox, WhatsApp, Messenger, Instagram, Telegram, e-mail, web chat and internal tickets; AI agents with a knowledge base across three providers; a visual automation builder with fourteen ready-made templates; the chat-to-client conversion funnel; an embeddable widget with origin allowlisting and signed identities.
- Three automation modes so the product runs on shared hosting without cron, on cron, or on a queue worker.
- Support tickets, blog, pages, FAQs, news, landing page studio, social sign-in, blacklists and reports.
- English and Spanish translations, light and dark interface, and a fully documented
.env.
Under consideration for future releases
Not part of version 1.3.5 and not a commitment, but the directions the product is most likely to grow in:
- An affiliate and referral system, so clients earn on the top-ups they bring in.
- Coupon codes for Add Funds and for orders.
- Richer subscription services, with rules for automatic refills on new posts.
- Additional interface languages.
16. Add-ons and payment gateways
16.1 What add-ons are
An add-on is a self-contained folder under addons/ that extends the panel without
editing a single core file. It registers itself through hooks — the same hooks the core uses
internally — so an add-on can contribute a payment gateway, its own routes, its own admin
screens and its own settings, and can be switched off again without leaving anything behind.
Admin → Add-ons lists what is installed, with the version each one declares and a link to its settings. An add-on that is disabled stops registering its hooks immediately: its driver disappears from the selects, its routes stop resolving, and the data it wrote stays in the database untouched, so enabling it again picks up exactly where it left off.
Installing one. Add-ons are separate packages, each with its own version and
its own ZIP: the panel ships with none installed and addons/ starts empty. Click
Upload Add-on, choose the .zip you downloaded, and it is validated
and installed — you switch it on afterwards with Enable. An
add-on that brings database tables shows Upgrade Database when it has migrations
left to run.
If the upload does not go through. Press Install and the screen answers
“The package field is required” even though you picked the file? Then the
file never reached the server, and the size of your package has nothing to do with it — a
security filter in front of your site, a proxy such as Cloudflare, a session that expired while
the dialog was open, or a storage/ folder your PHP user cannot write to will all
stop it in the same silent way. You do not need to find out which: extract the ZIP on
your computer and copy the folder inside it into addons/ with your FTP client or
File Manager. Reload Admin → Add-ons and the package is listed as
Found in the addons folder with an Install button next to it. The
result is identical to uploading — same installer, same checks.
/update — and both list what they did.my_addon_invoices, never
invoices. A package whose migrations claim a table outside that prefix is refused at
upload, because a name that collides with the panel's own schema puts the operator's data at risk.
And settings do not need a table at all: every add-on owns a JSON bag on its
registry row, so a later version can add options without a migration. The full contract is in
addons/README.md inside the package.16.2 Payment gateways
A payment method in Admin → Payments is one gateway configured and named by you. You may create as many as you like, including several on the same driver — a live one and a sandbox one, or one per market — and each has its own credentials, its own minimum and maximum, its own sort order and its own on/off switch.
Three drivers are built into the panel; further gateways arrive as add-ons (§16.1), which is how the Korapay driver below is installed:
| Driver | What it accepts | Confirmation |
|---|---|---|
| Manual / Bank transfer | Anything you accept off-platform: bank transfer, cash, a local wallet. You write the instructions the client sees and may attach an image (QR, bank details). | You approve or reject each deposit in Payments. Nothing is credited until you do. |
| Stripe | Cards, and whatever else your Stripe account has enabled. | Signed webhook, credited automatically. |
| PayPal | PayPal balance and cards. | Signed webhook, credited automatically. |
| Korapay (separate add-on) | Cards, bank transfer, pay-with-bank and mobile money across Africa. | Signed webhook, credited automatically. |
Every automatic gateway needs its webhook registered on the provider's side, and every gateway modal shows its own webhook URL in a copyable field — copy it from there rather than typing it, so the path is always right for your domain.
Which methods a client sees. A gateway declares the currencies it can charge in. A client whose display currency is not one of them is not blocked: the panel converts the amount at your configured exchange rate (§8.4) and charges the gateway in a currency it does accept. Either way the wallet is credited in the base currency, and the invoice states what the client actually paid, in the currency they paid it in.
addons/README.md in your installation
states the package layout and the manifest a developer has to produce; the Korapay add-on is a
complete working example of exactly that, in three files.16.3 Setting up Korapay
Korapay settles in
NGN, KES, GHS, USD, XAF, XOF and ZAR, which makes it the practical way to take
money across much of Africa. It is an add-on: install korapay-gateway.zip from
Admin → Add-ons and press Enable before the steps below
— until you do, the driver does not appear in the Payments screen.
What you need: a Korapay merchant account, and its Public Key and Secret Key (Korapay Dashboard → Settings → API Keys). Korapay issues a separate pair for test mode and for live mode — the panel uses whichever pair you paste.
- Open Admin → Payments and click Add payment method.
- Choose the Korapay driver and give the method the name your clients will see on the Add Funds page.
- Paste the Public Key and the Secret Key.
- In Currencies, list the codes this merchant account settles in, separated
by commas —
NGNon its own, orNGN,GHS,KESif your account is enabled for several. One method covers them all; you do not need one method per currency. Left empty it falls back to NGN, so the gateway never claims to accept everything. - Copy the webhook URL shown in the modal and paste it into Korapay Dashboard → Settings → Webhooks. Without it, payments succeed at Korapay and never reach the wallet.
- Save, switch the method on, and send yourself one small real top-up before announcing it.
What a client experiences. They pick Korapay on Add Funds and enter an amount in their own currency. The panel opens Korapay's own hosted checkout — card details never touch your server — charging in the currency the merchant account settles in, converting first if the client's currency differs. When Korapay's signed webhook confirms the charge, the wallet is credited (plus any top-up bonus, §8.3) and the client is returned to a receipt showing what they paid, the bonus and their new balance, all stated in their own currency.
If a payment does not arrive:
- Confirm in Korapay Dashboard → Transactions that the charge really is Successful — an abandoned checkout looks identical from the client's side.
- If it is successful there but the wallet did not move, the webhook is almost always the cause: check that the URL registered at Korapay matches the one in the modal exactly, over HTTPS. Korapay's dashboard shows each delivery attempt and the response it received.
- Admin → Transaction Logs shows the deposit the moment the webhook is accepted, so it is the quickest place to tell "never arrived" from "arrived and failed later".
16.4 Customising the order form with an add-on
Panels sell different things, and sooner or later the New Order form needs a field the standard SMM types do not have — a target keyword for a ranking service, a campaign code, a market to target. That is an add-on, not a core edit: an add-on can add its own fields to the order form, and what the customer types is validated, stored with the order, shown on the order confirmation and in Admin → Orders → View details, and forwarded to your provider with the rest of the order.
An add-on can also replace a built-in control. The drip-feed block, for instance, asks for runs and an interval; an add-on can hide it and offer a single field in the language your market speaks — "views per hour" — converting it to runs and interval behind the scenes. The delivery engine is unchanged; only what the customer sees is.
addons/, which
updates never touch — it keeps working, version after version. The hooks available, the field
definition format and two complete working examples are documented in
addons/README.md inside your installation.16.5 Themes — extra designs from an add-on
A theme is an add-on that brings DESIGNS rather than a gateway. One package can carry two: one for your public landing page and one for the client portal your customers order from. They are independent — you may run a theme's landing with the portal design you already use, or the other way round.
Installing one is exactly §16.1: Admin → Add-ons → Upload Add-on → Enable. From that moment the design appears in the two pickers you already know — Admin → Landing for the public page and Admin → Appearance for the portal — next to the designs that ship with the panel, with the same Apply and Preview buttons. Preview shows it on your real content without publishing anything.
Your brand still wins. A theme may ship the colour it was drawn around, and that colour is used only while a panel has never been branded. As soon as you set a colour in Admin → Branding, yours is applied on that design like on any other — the panel applies it last, after the theme's own stylesheet, so a package cannot overrule it.
Resellers. A theme's designs obey the two decisions you already take: which designs a plan includes (§10) and which of those a particular reseller may use (§9). A reseller you did not grant it to never sees it in their picker, which is what lets you keep a design for a higher tier.
If it goes away. Switch the theme off, uninstall it, or move a reseller to a plan that no longer includes its design: the panel falls back to a design that panel is allowed to use, on the very next page load. No page goes blank and nothing you wrote is lost.
"type": "theme" in its manifest and returns its designs from the
themes.landing and themes.client hooks. The landing accepts a design
built entirely from your own variables and stylesheet; the portal is styled by a compiled
stylesheet the buyer never rebuilds, so a portal design names one of the three built-in skins as
its base and repaints it. Your files are served straight from your package — never
copy anything into public/, an update would remove it. The full contract, with a
worked example, is in addons/README.md inside your installation.